My sister, Erin, found this adorable craft on The Party Event (http://thepartyevent.wordpress.com/2013/01/30/valentines-day-candy-and-sweets-for-your-sweetheart-photo-booth-props/) and made the best Valentine’s day gift for someone very special that lives far away. I thought that it was the sweetest idea and that it would be fabulous for my husband who works long hours and often comes home after Reagan is already in bed. This Valentine is perfect for when he misses her and needs a hug.
Erin and I both strayed from the way that the hug was created on The Party Event (http://thepartyevent.wordpress.com/2013/01/30/valentines-day-candy-and-sweets-for-your-sweetheart-photo-booth-props/) and I LOVE the final products!
I decided that Reagan and I were going to make three HUG Valentine’s, one for Reagan’s dada, one for my mother-in-law, a.k.a Grammy and one for my father-in-law, a.k.a PaPa.
Below are materials and instructions for how to make Reagan’s HUG.
Materials
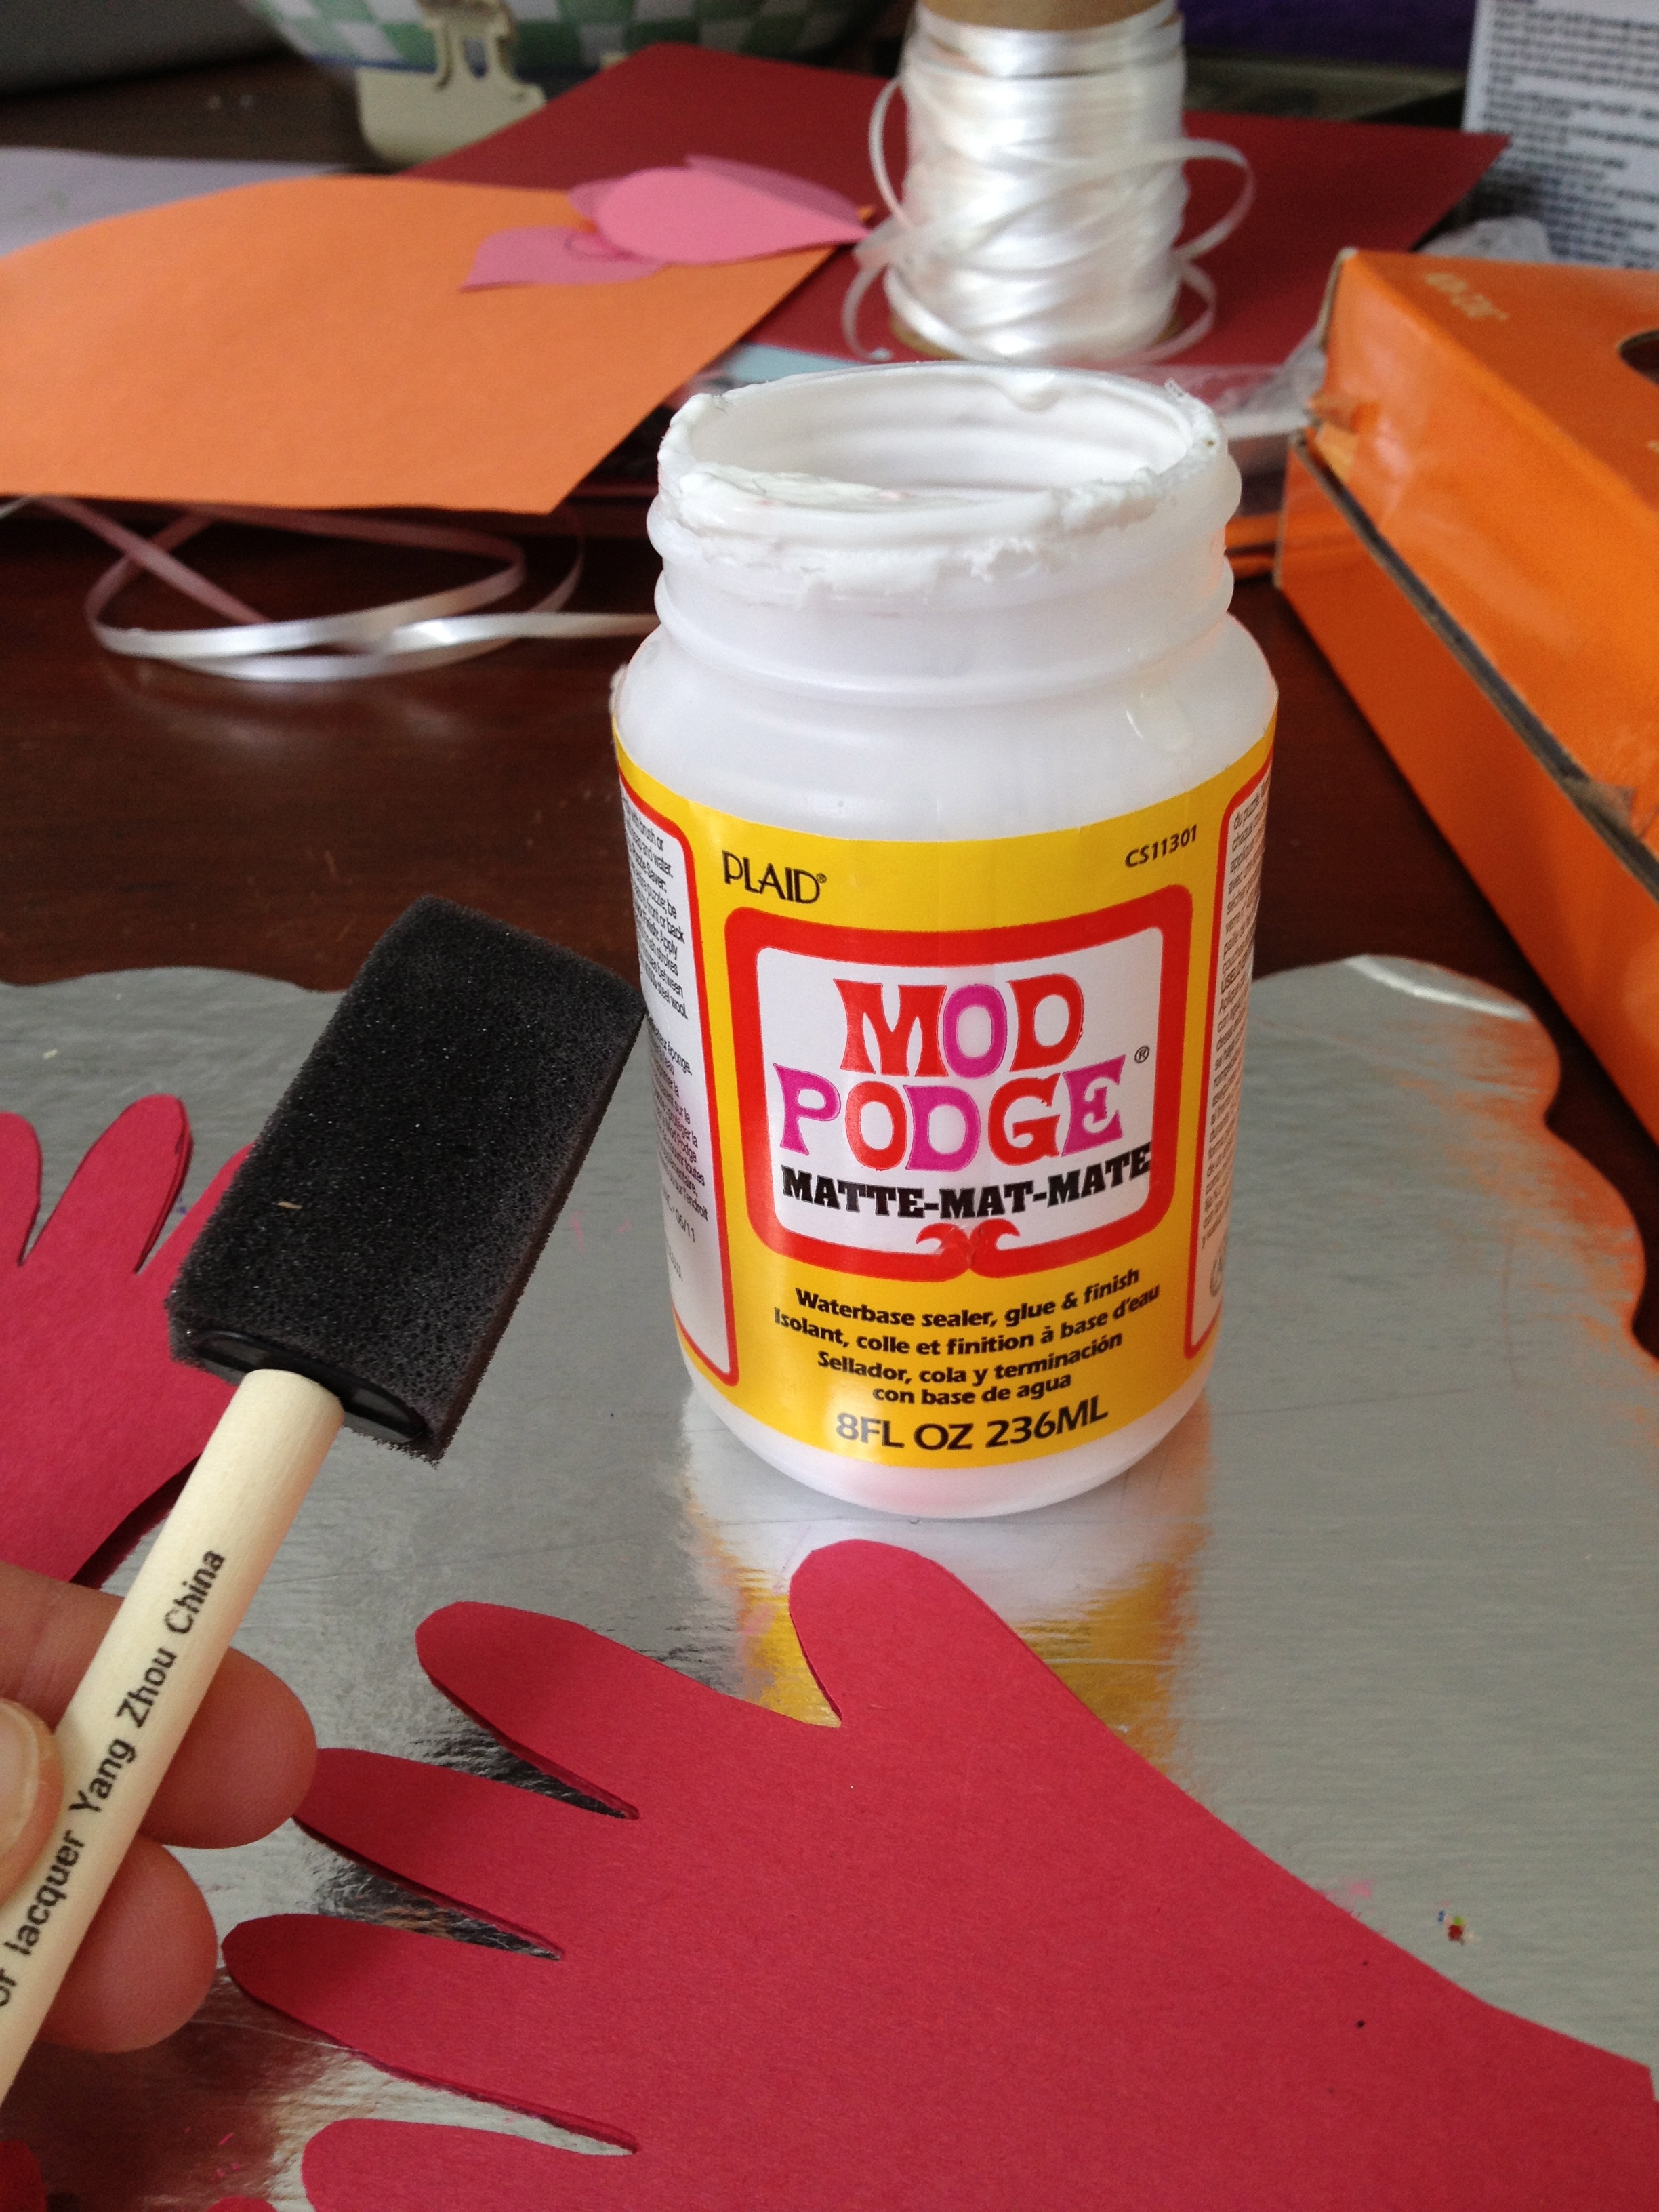
Mod Podge
Paint brush
index cards
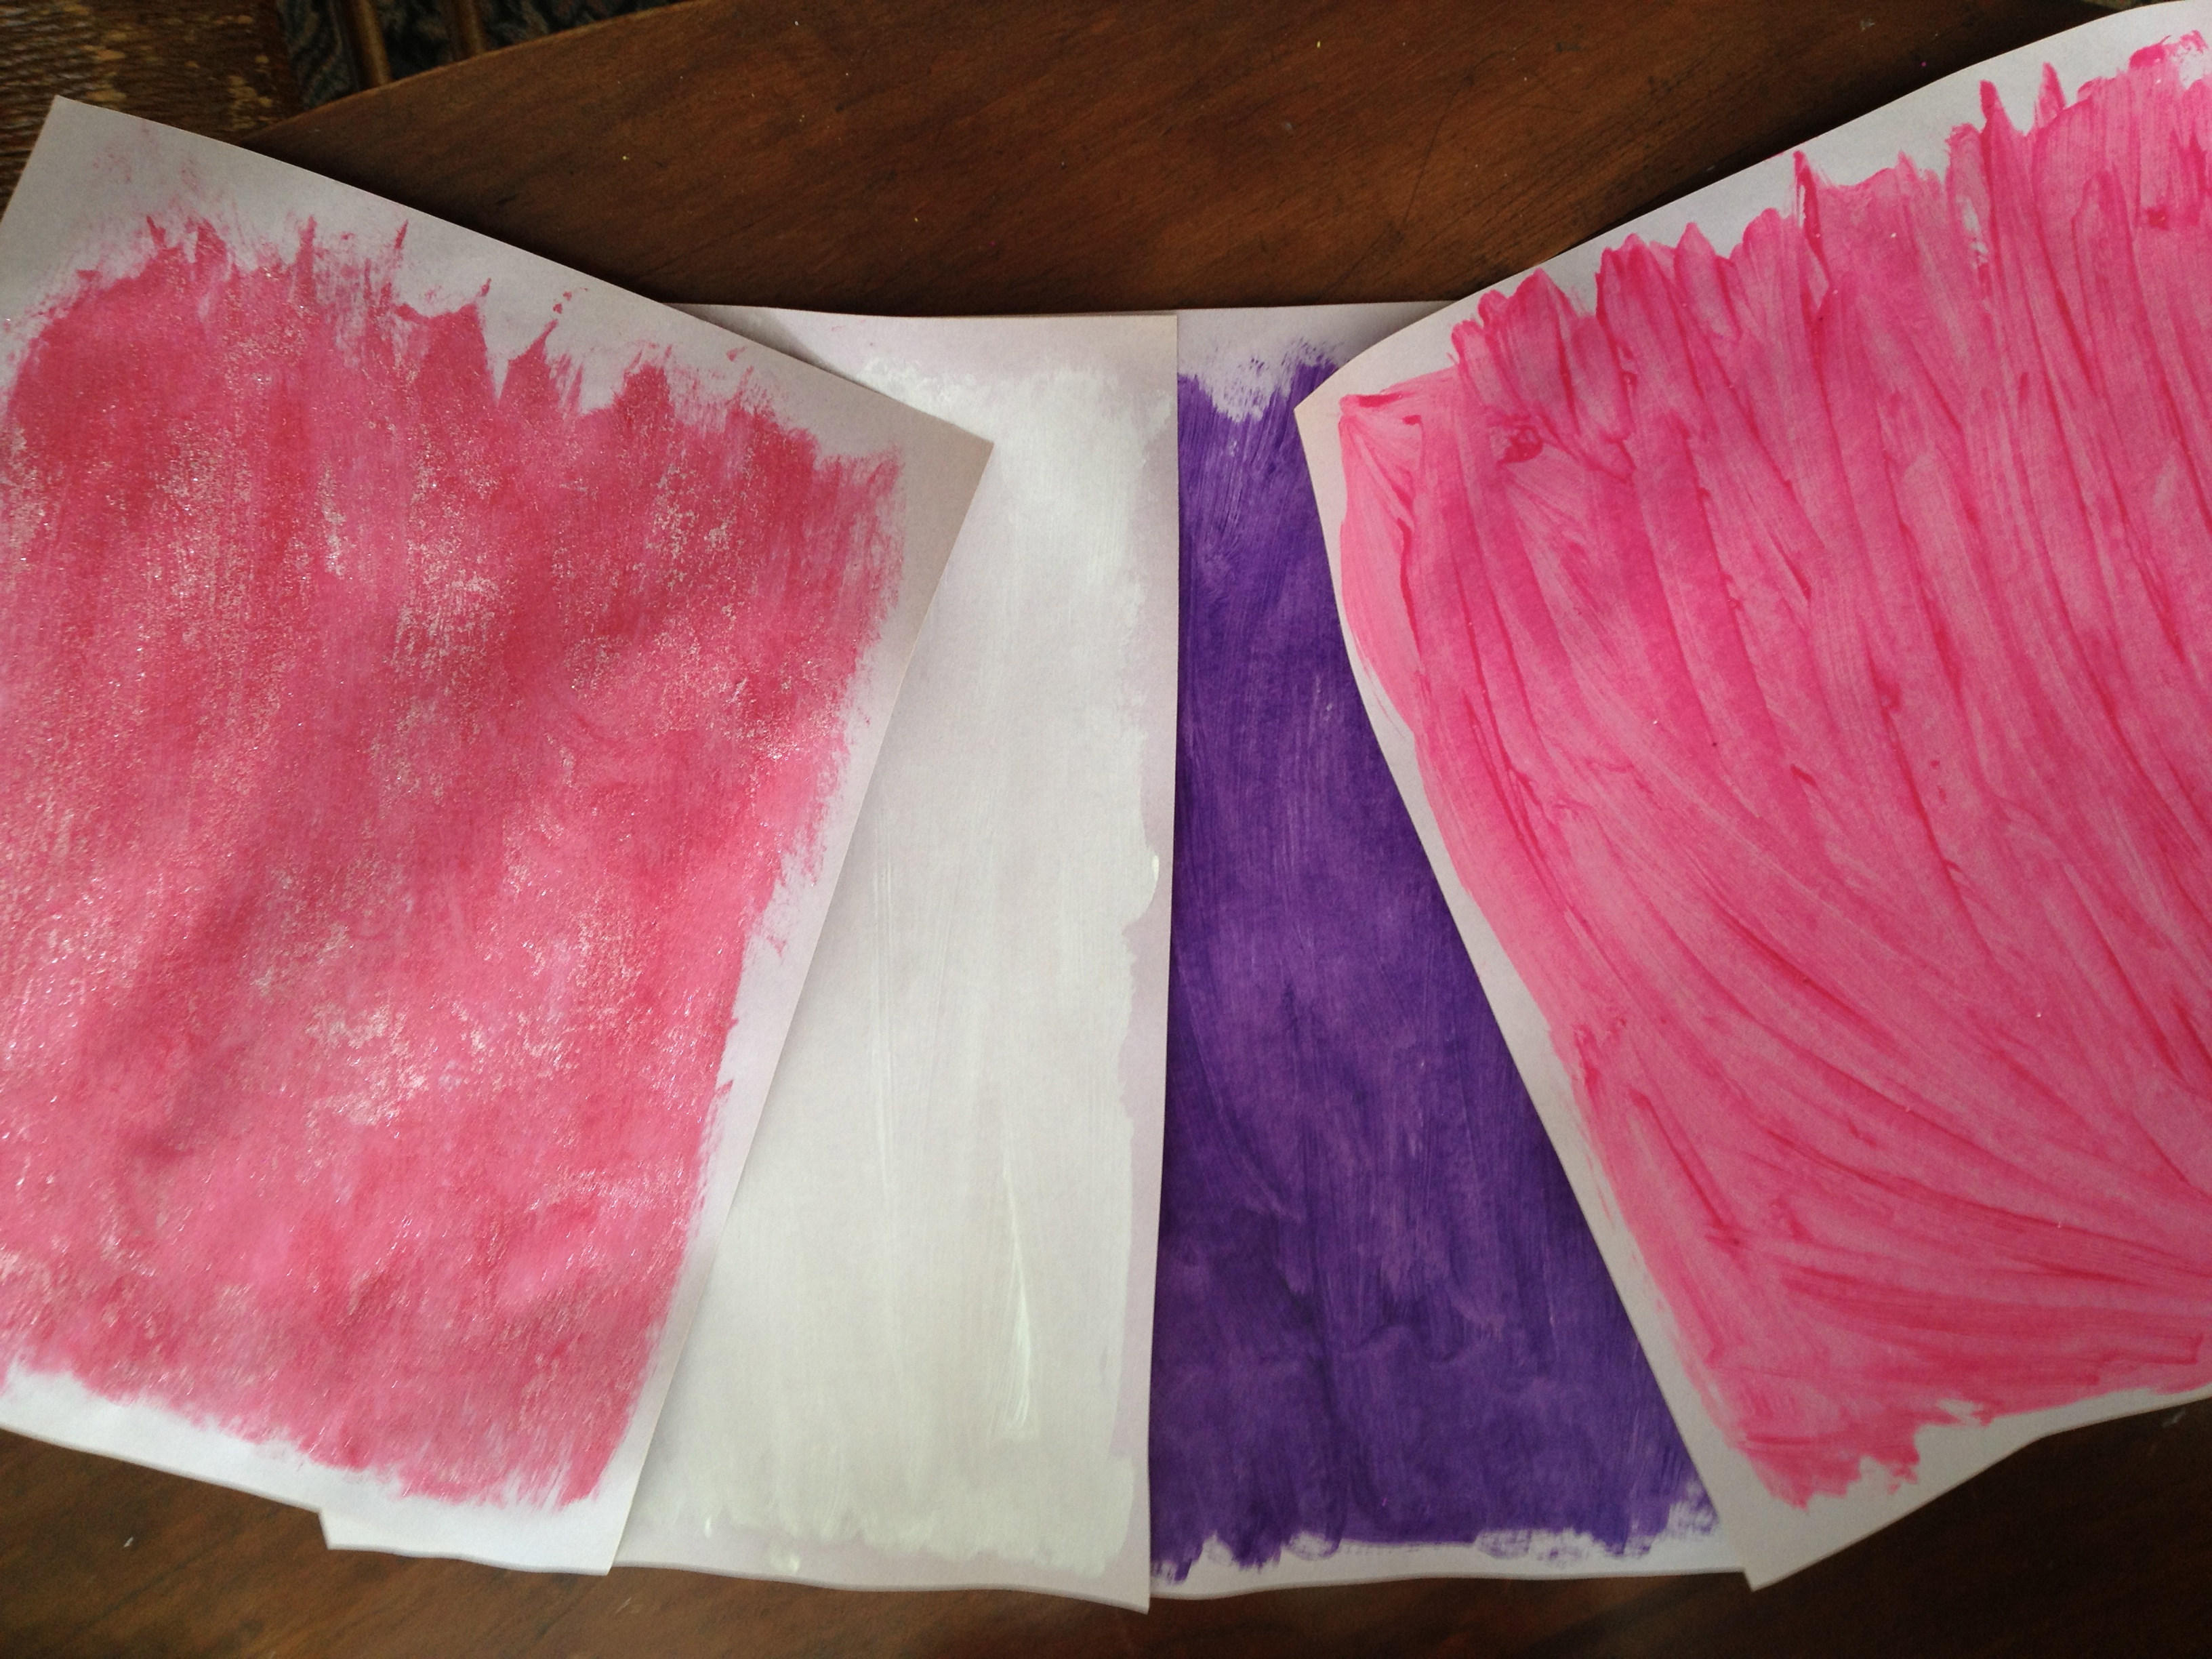
4 different colors of paint ( we used pink, red, white and purple)
4 large sheets of card stock light colored card stock- I used a very faded light blue
2 sheets of red construction paper
1 (8×10) piece of card stock
1 piece of paper (large enough to trace hand on)
scissors
string
sharp knife
Printed saying (http://thepartyevent.wordpress.com/2013/01/30/valentines-day-candy-and-sweets-for-your-sweetheart-photo-booth-props/)
Step 1:
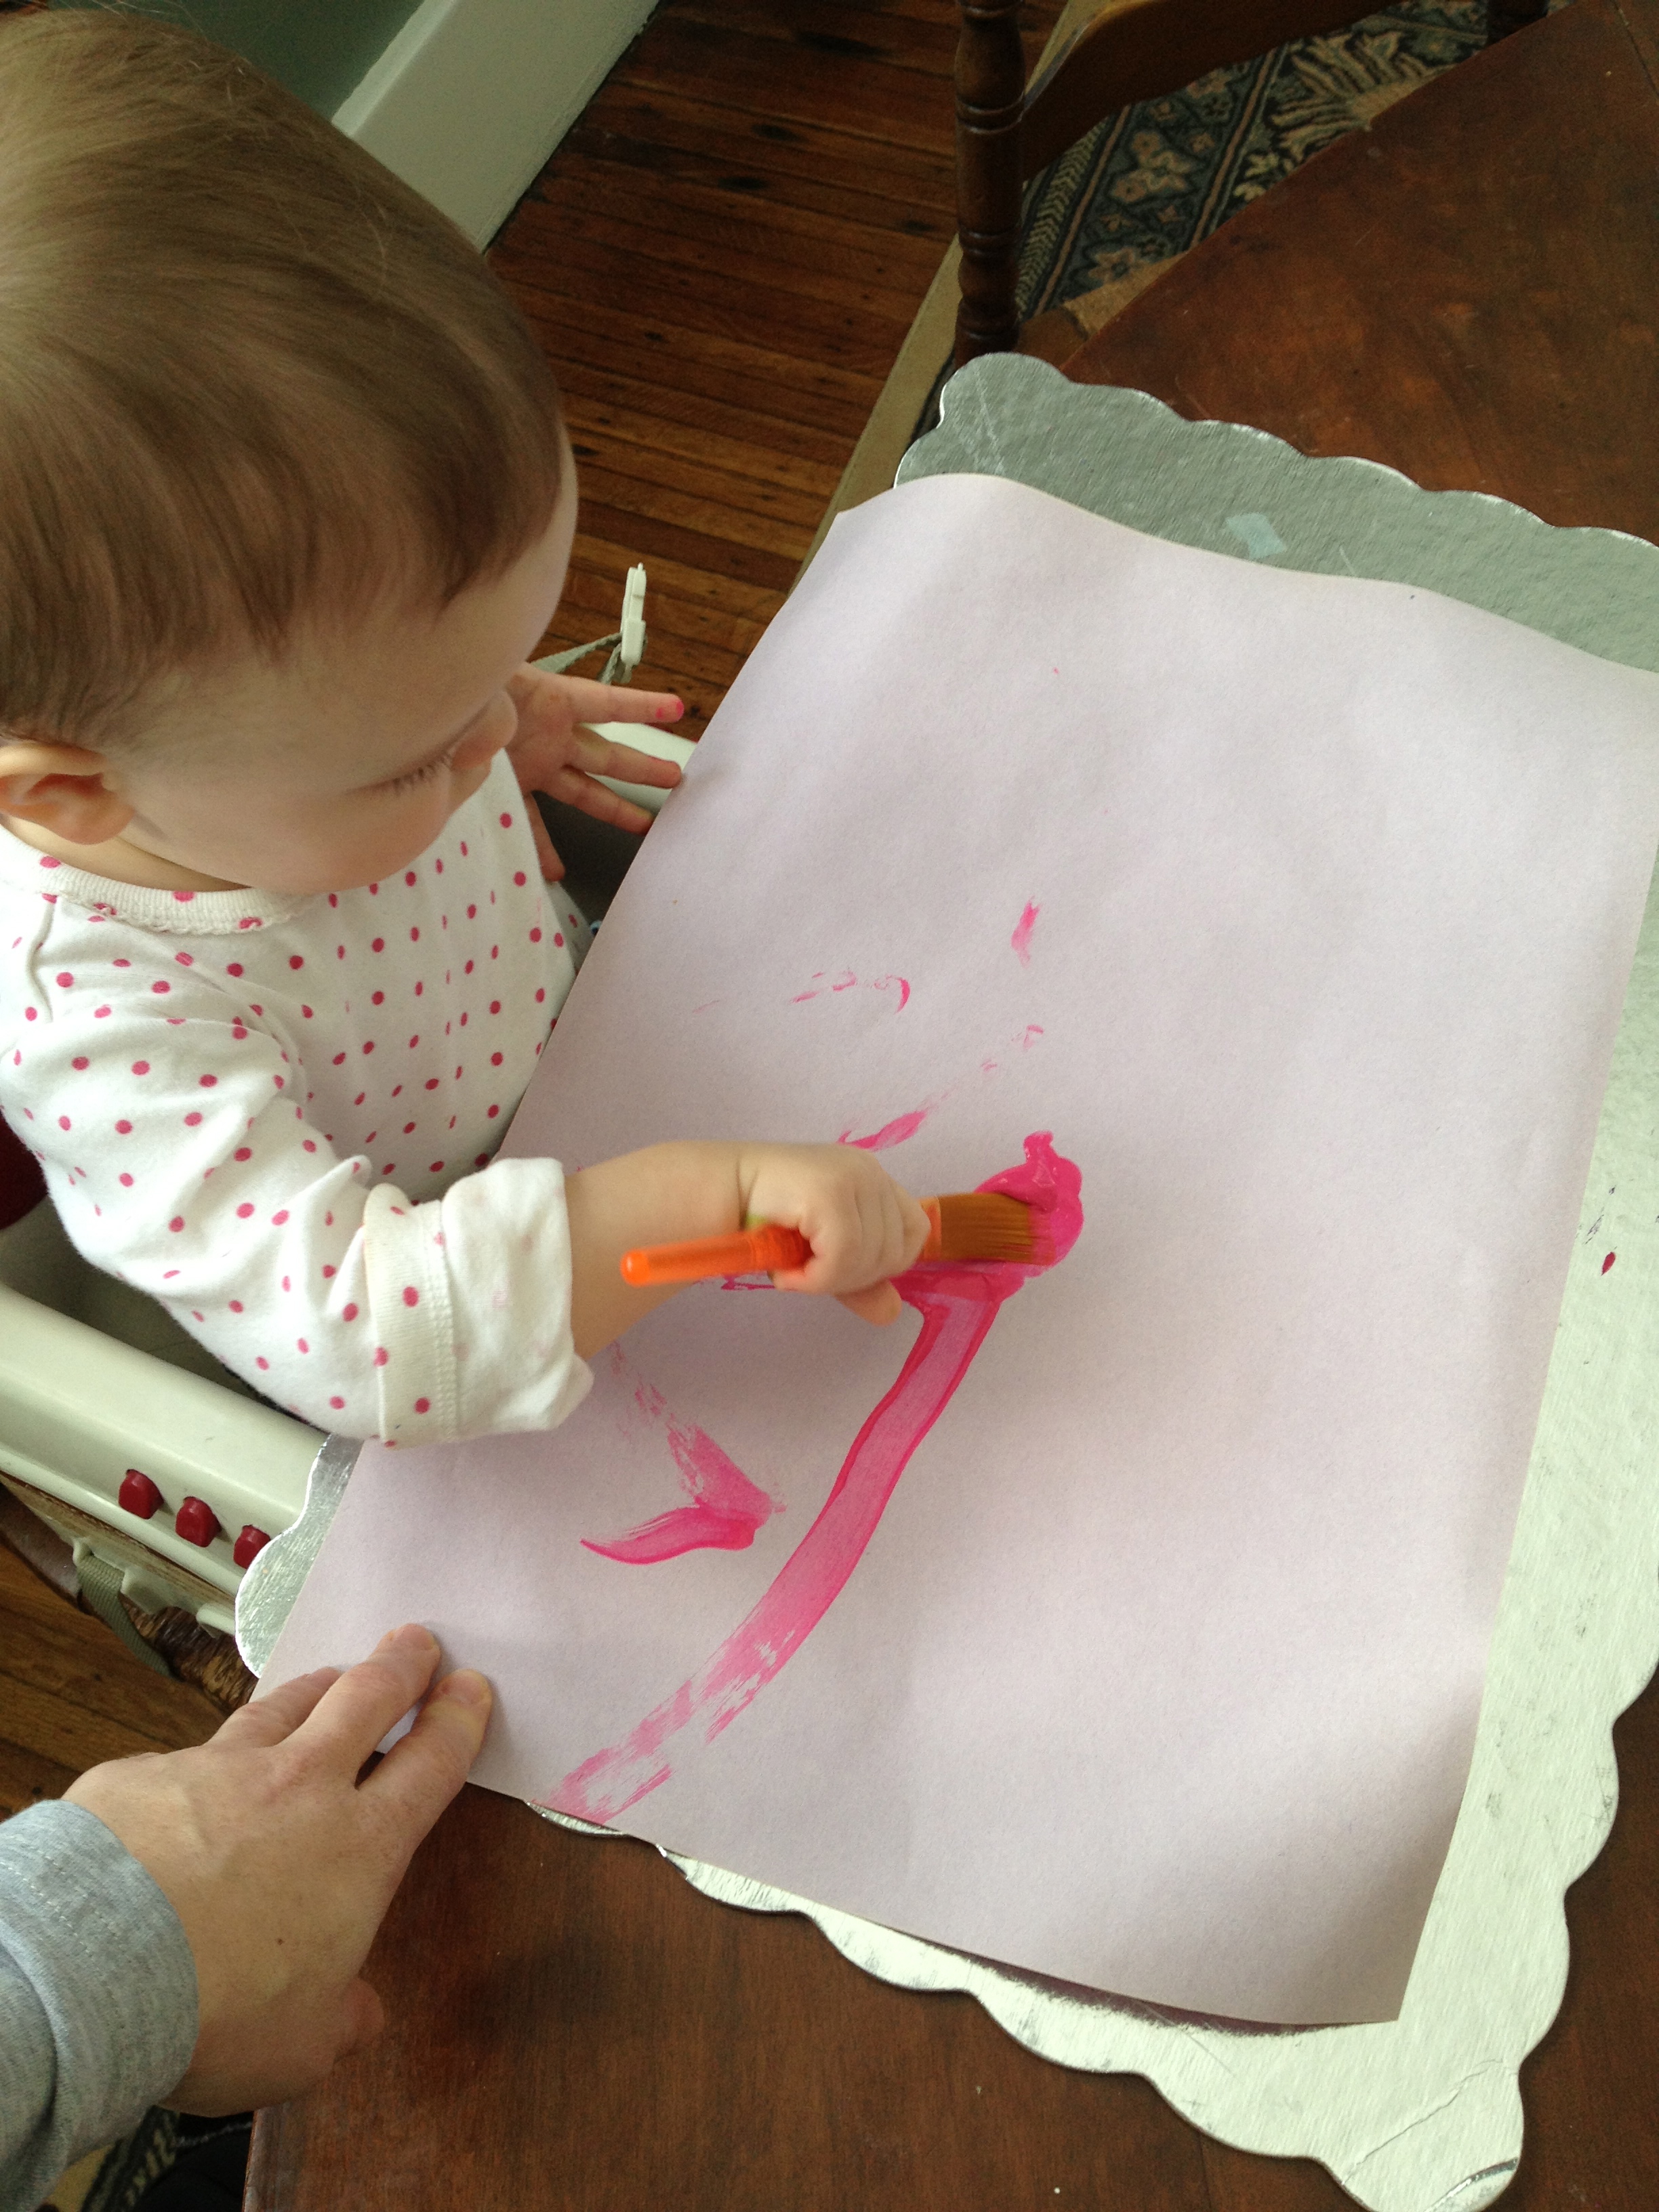
Paint both sides of the four sheets of large card stock paper- one sheet for each color (let one side dry before painting the other, this should be obvious…)
Step 2:
Trace hands onto piece of paper and cut along traced lines.

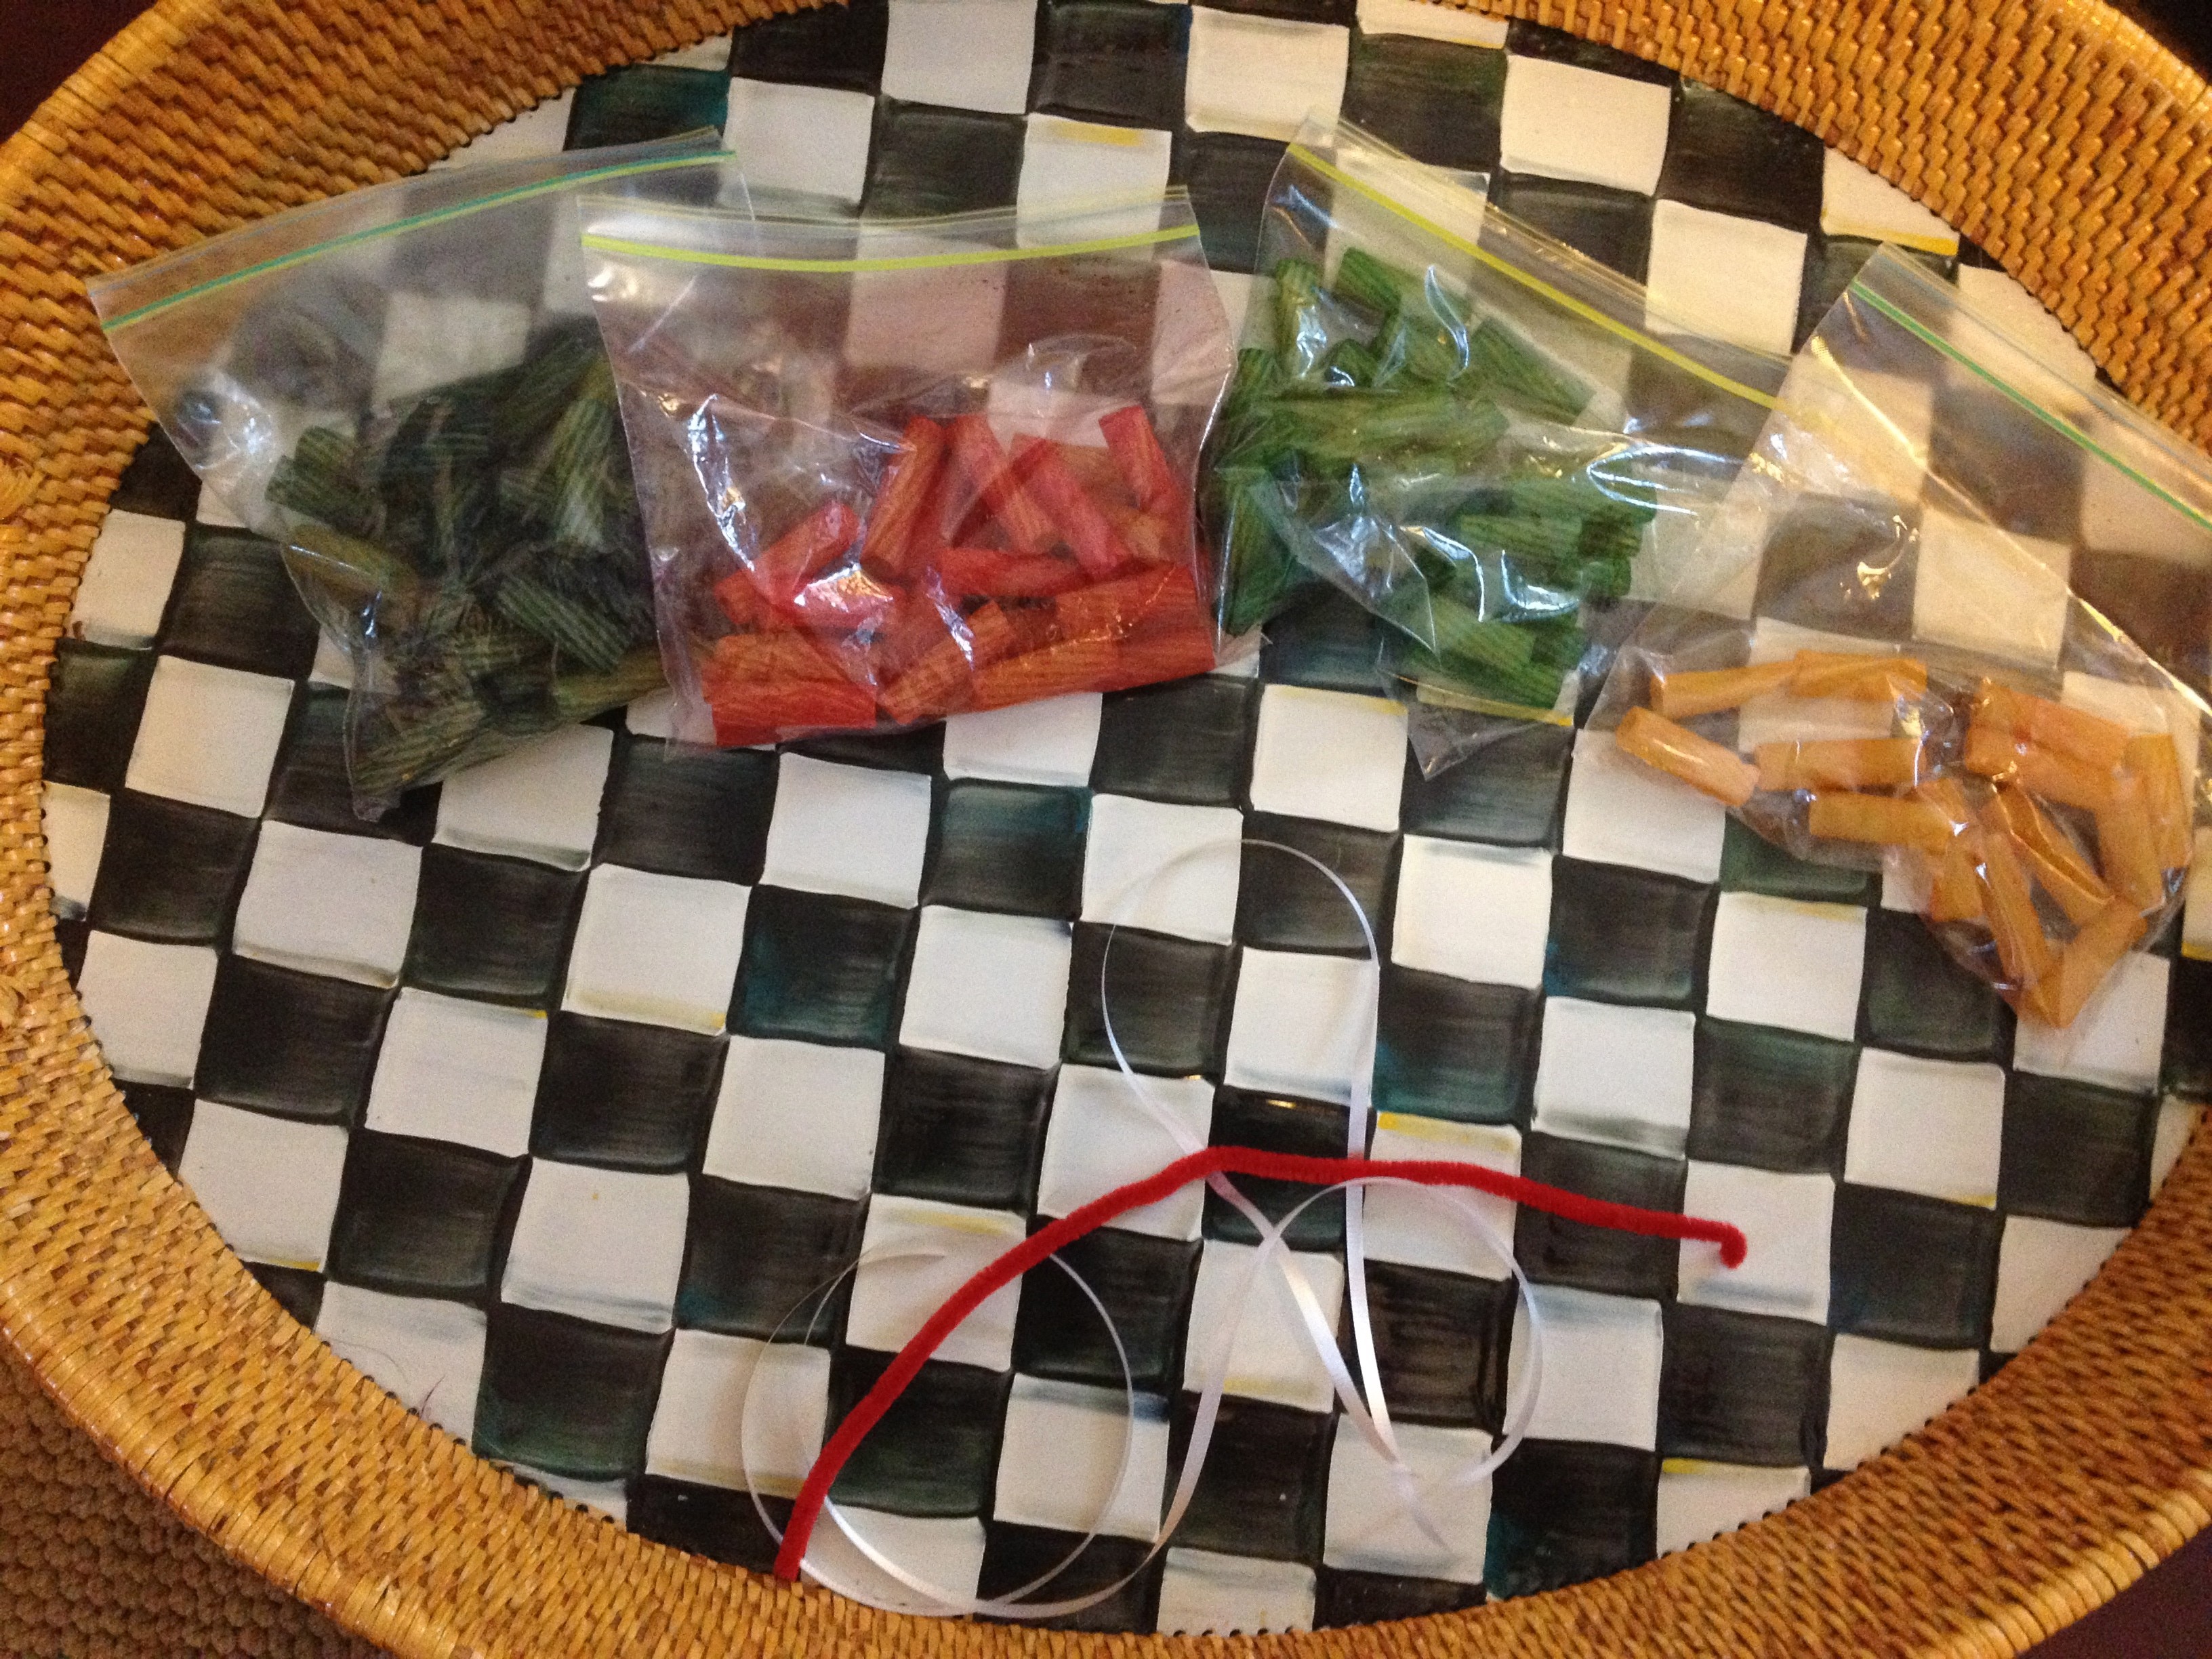
Step 3:
Trace cut out hand onto red construction paper. Using both pieces of red construction paper, one on top of the other, cut out traced hands. We needed six hands for our three valentines.


Step 4:
Measure the length of your child’s arm span. Ask them to put out their arms as if they were giving you a big hug. Henry’s HUG was perfect! It measured his exact arm length! I struggled a bit to get Reagan to stretch out her arms so I could measure her arm span.

Step 5:
Take two cut out red hands and mod podge one side of one hand. Place one end of the arm span measured ribbon onto the mod podge and then the other hand on top (You are sandwiching the string in-between the two hand cut-outs). Press down firmly. I would recommend putting something heavy, like a book, on top of your hands until they dry. Repeat this step three times. You are only gluing one side of the string in between two hand cut-outs at this point.

Step 6:
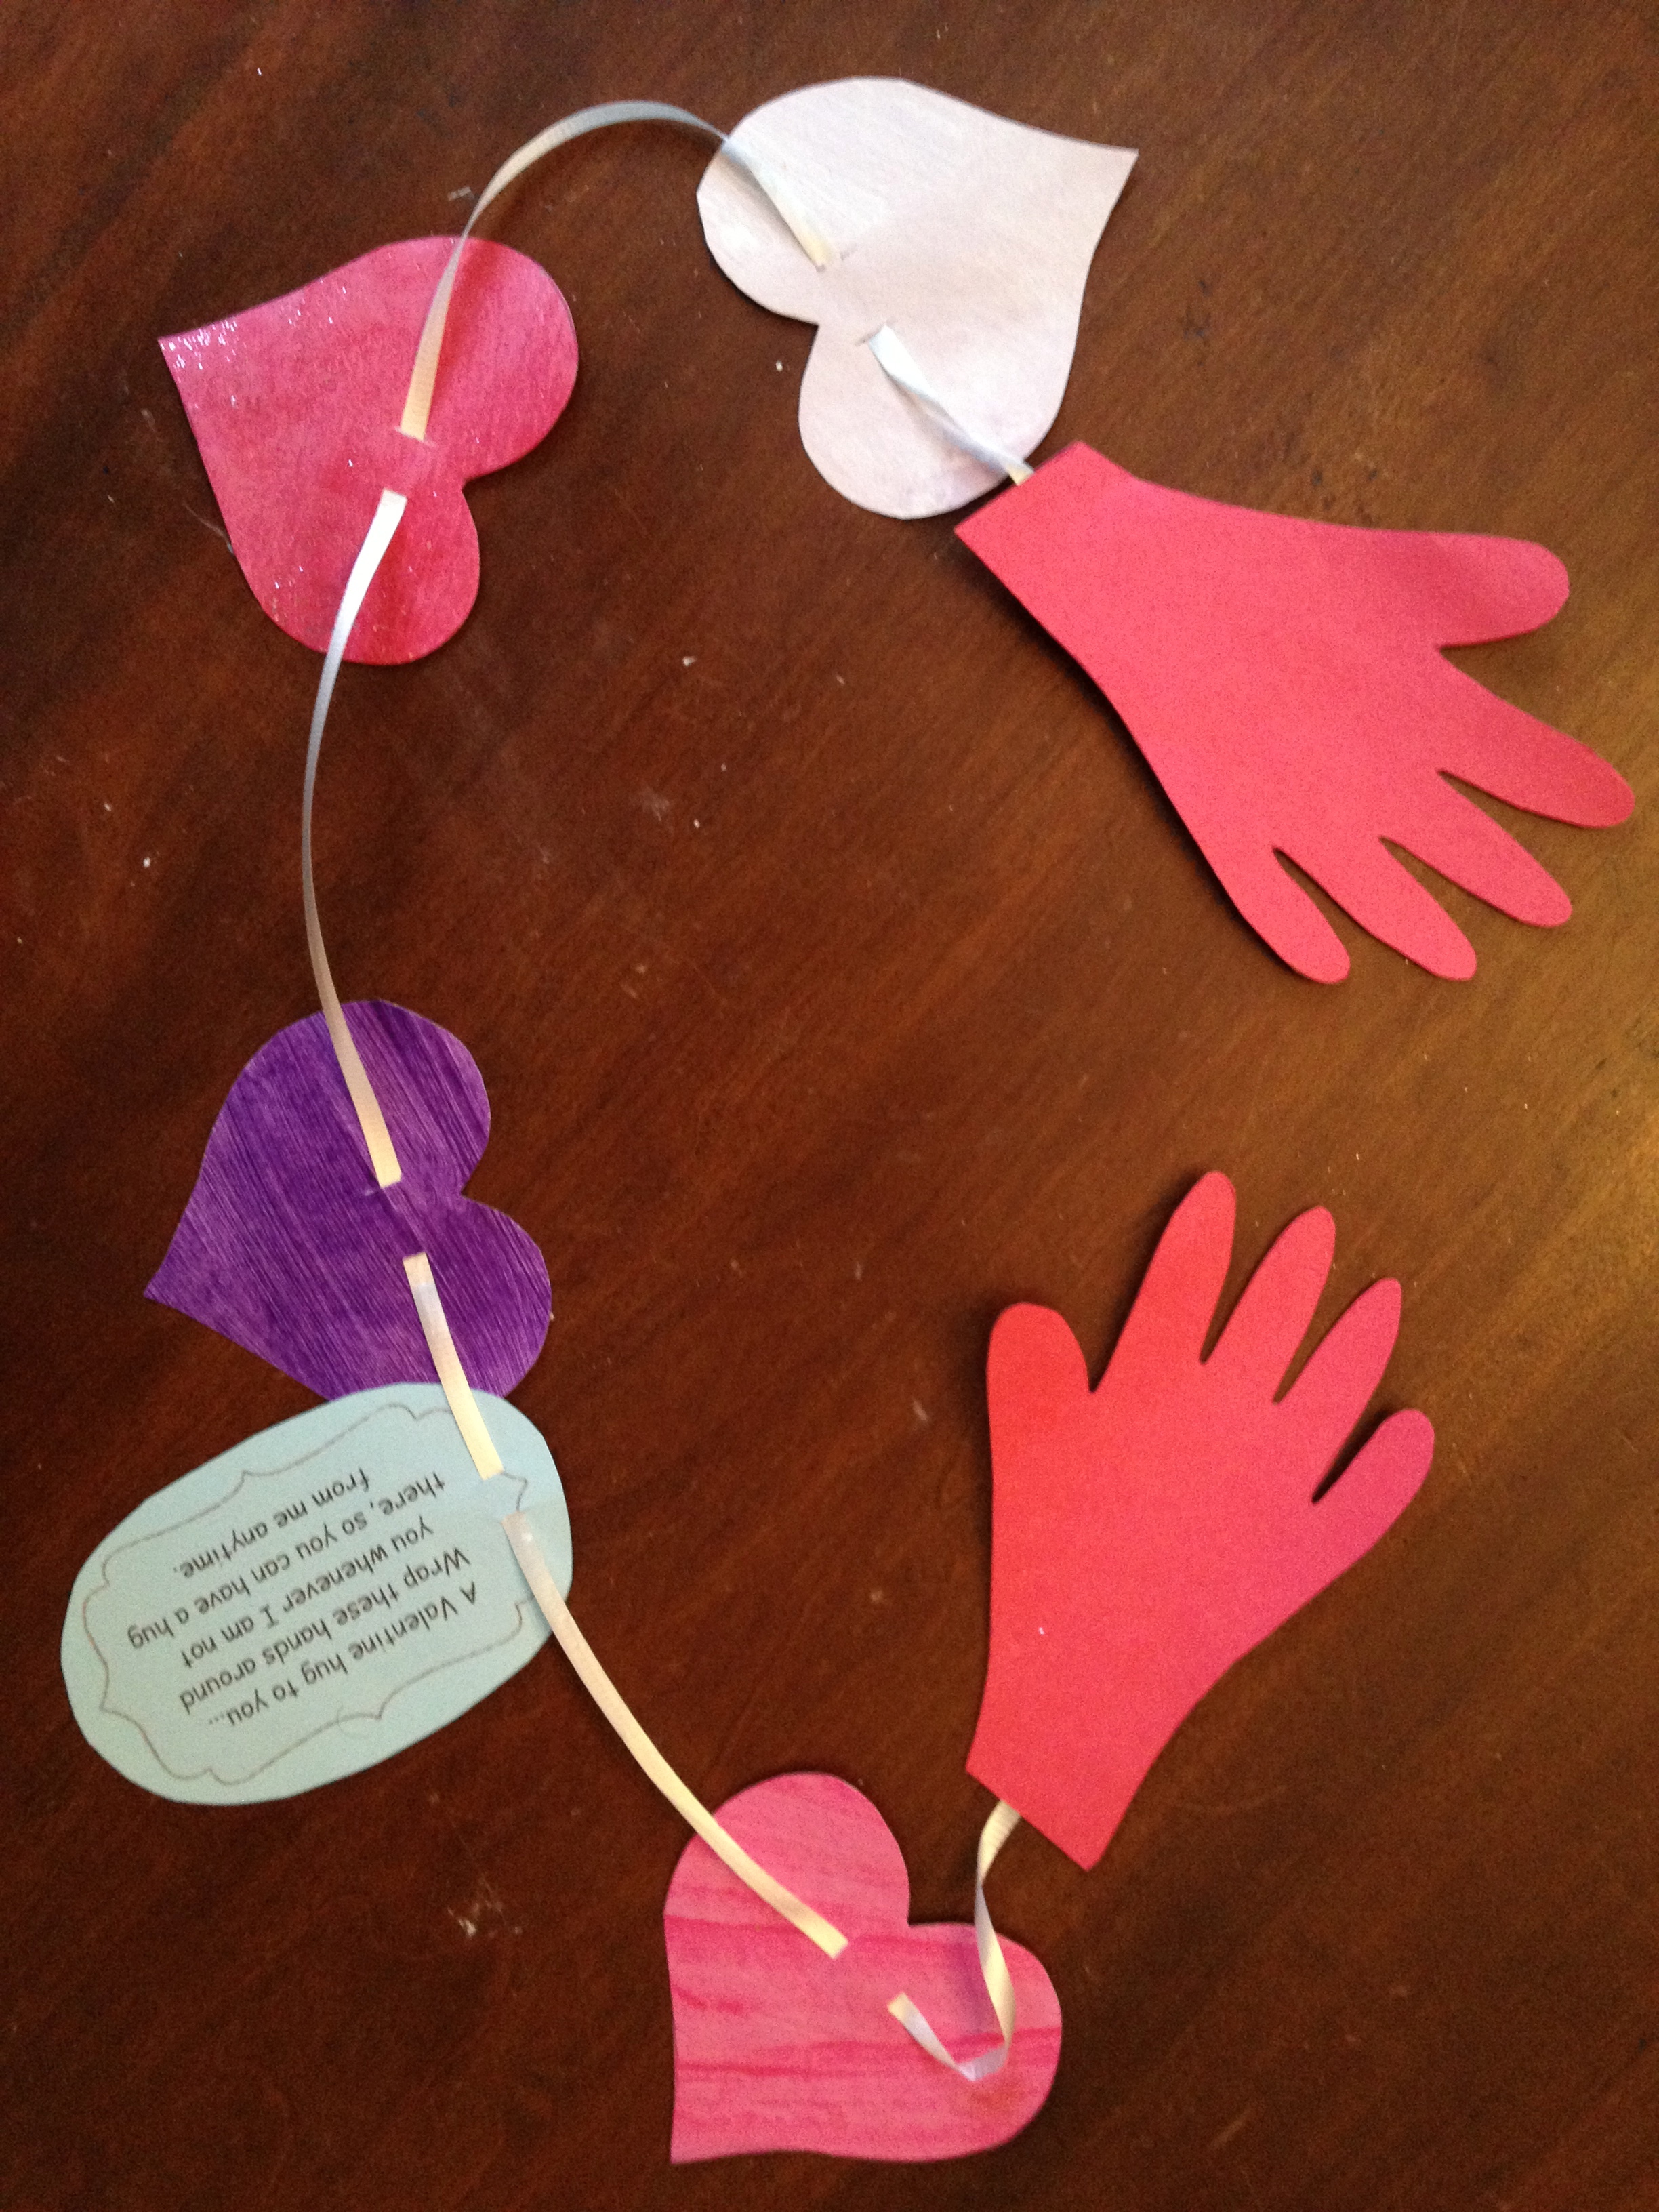
Cut three different sized hearts out of index cards. You will be tracing these hearts. I only ended up using one of the three sizes that I cut out.

Step 7:
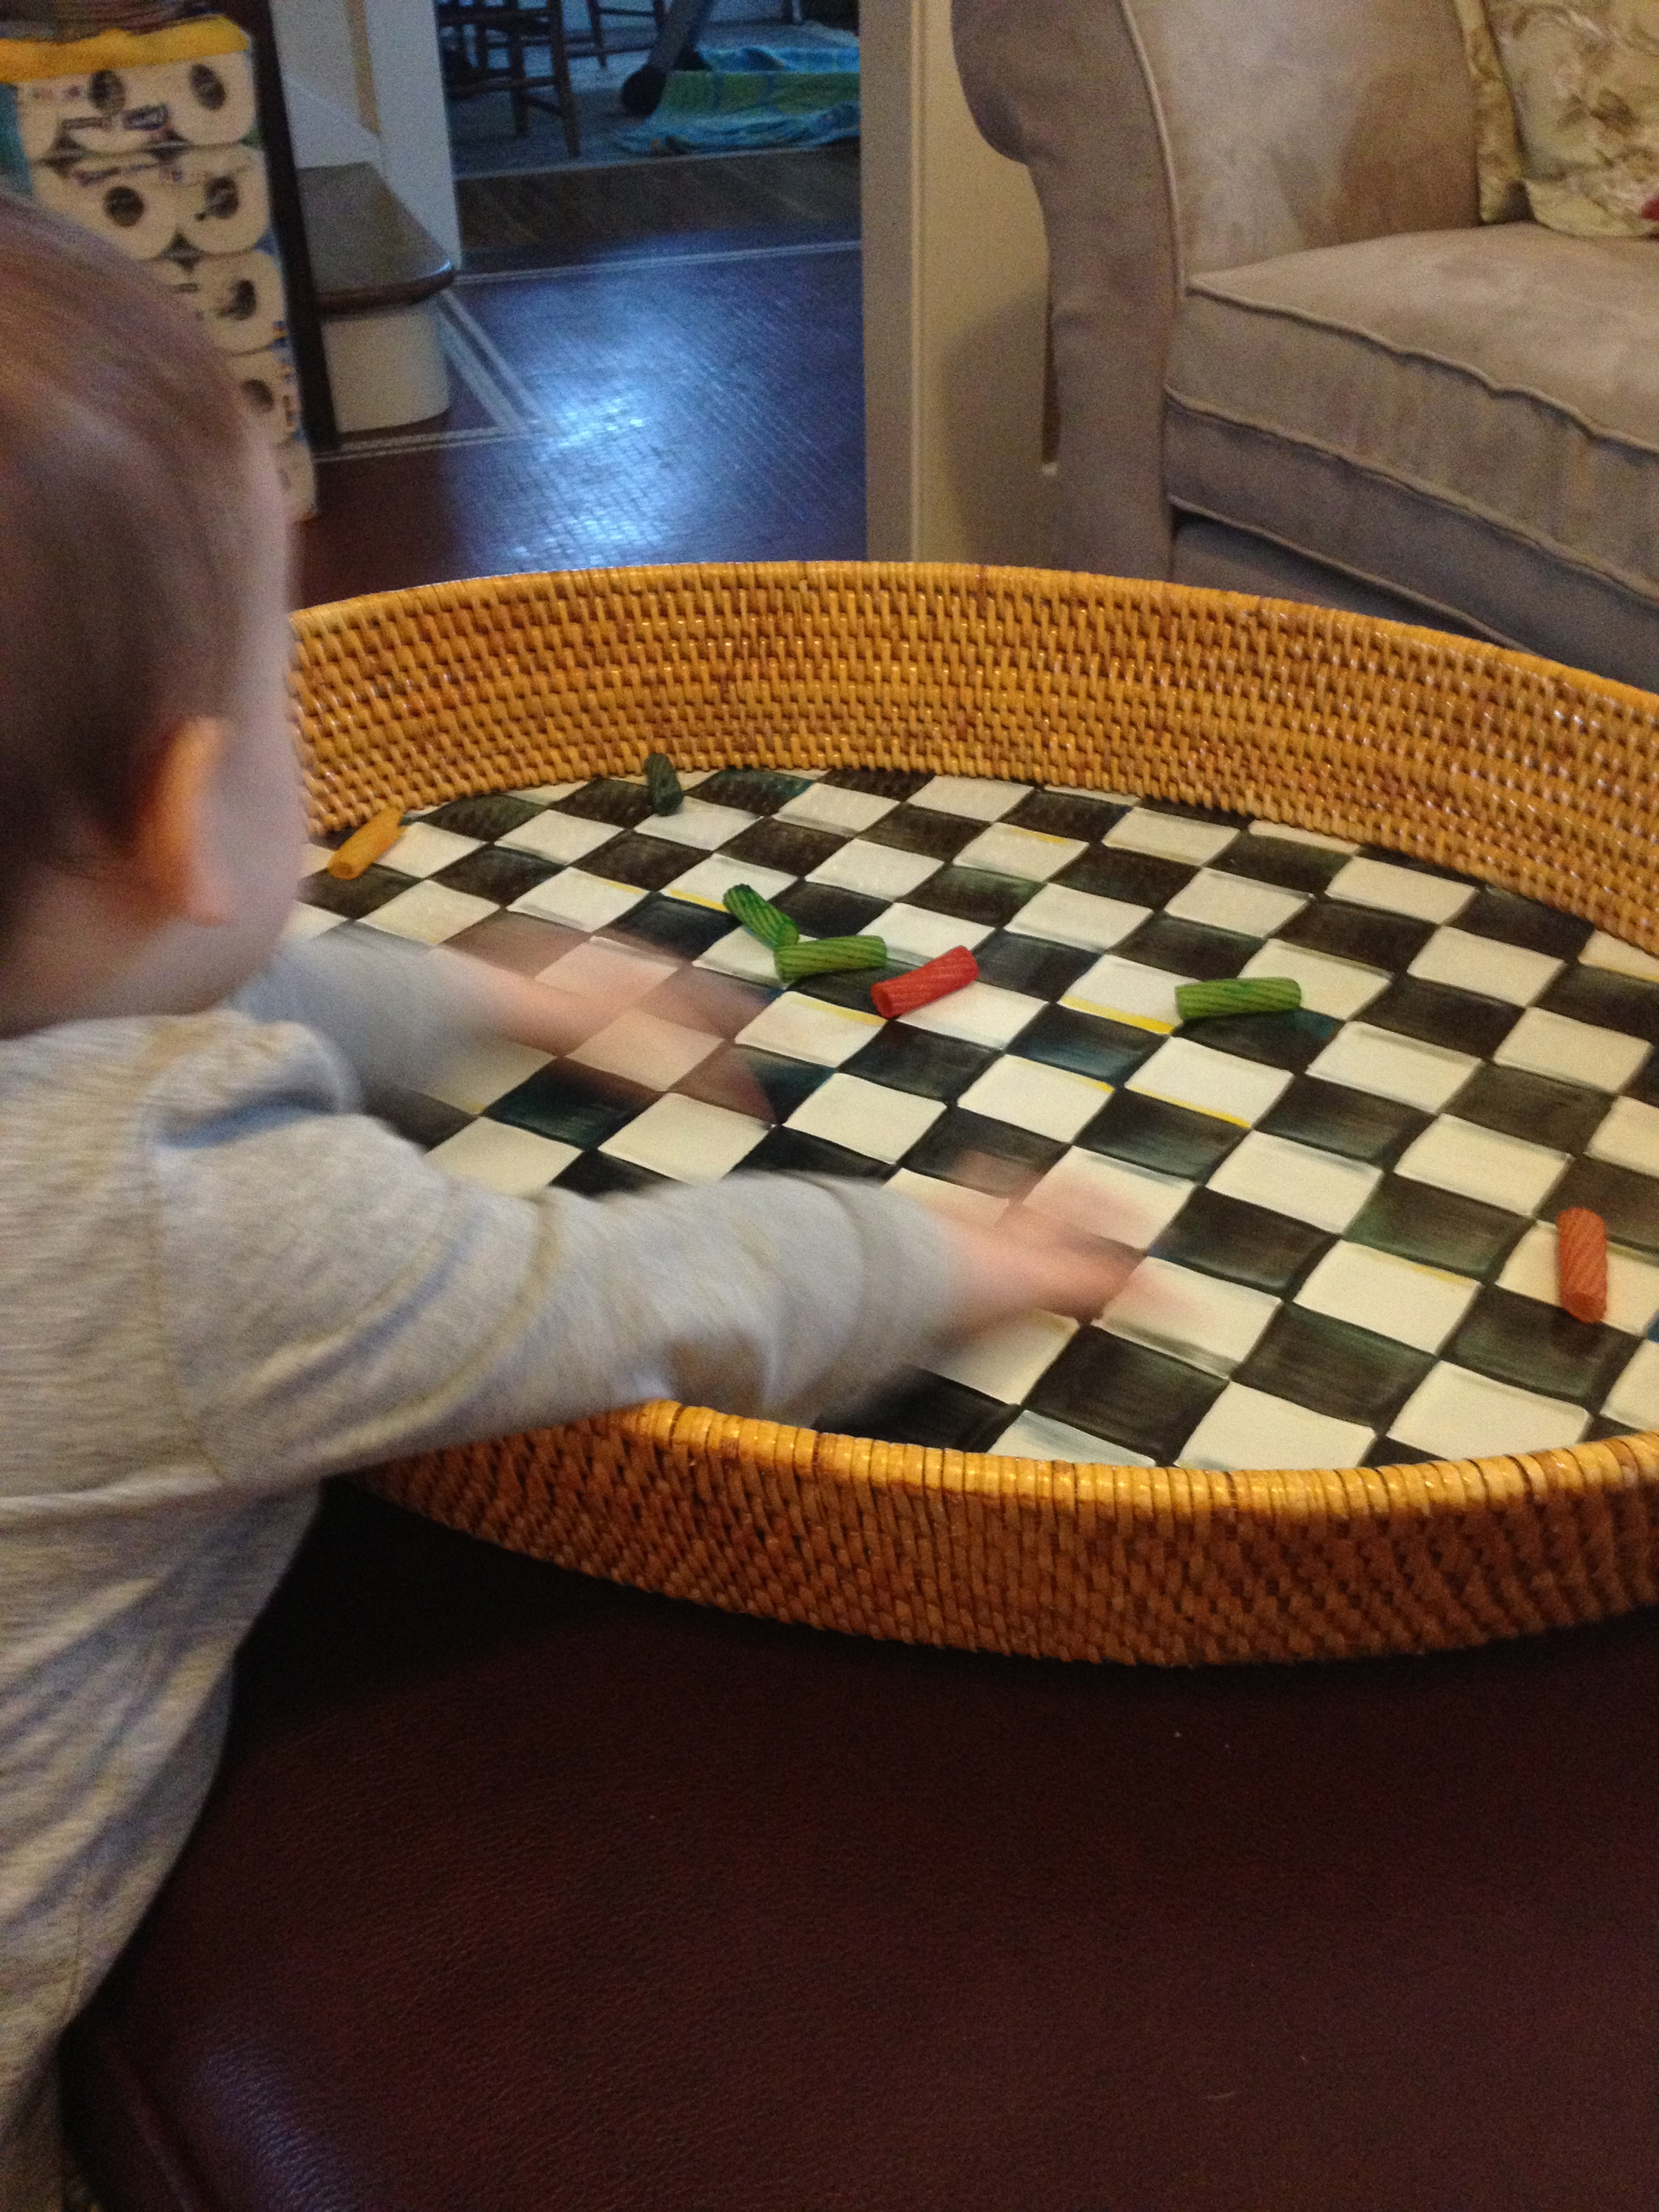
Trace the cut out index card hearts onto the 4 large painted card stock pieces of paper. Cut out the hearts. This is where it became a bit tedious…there were a lot of hearts that needed to be cut out, that I didn’t even use! These will be going into the Valentine’s box, so at least I saved myself some trouble for next year!


Step 8:
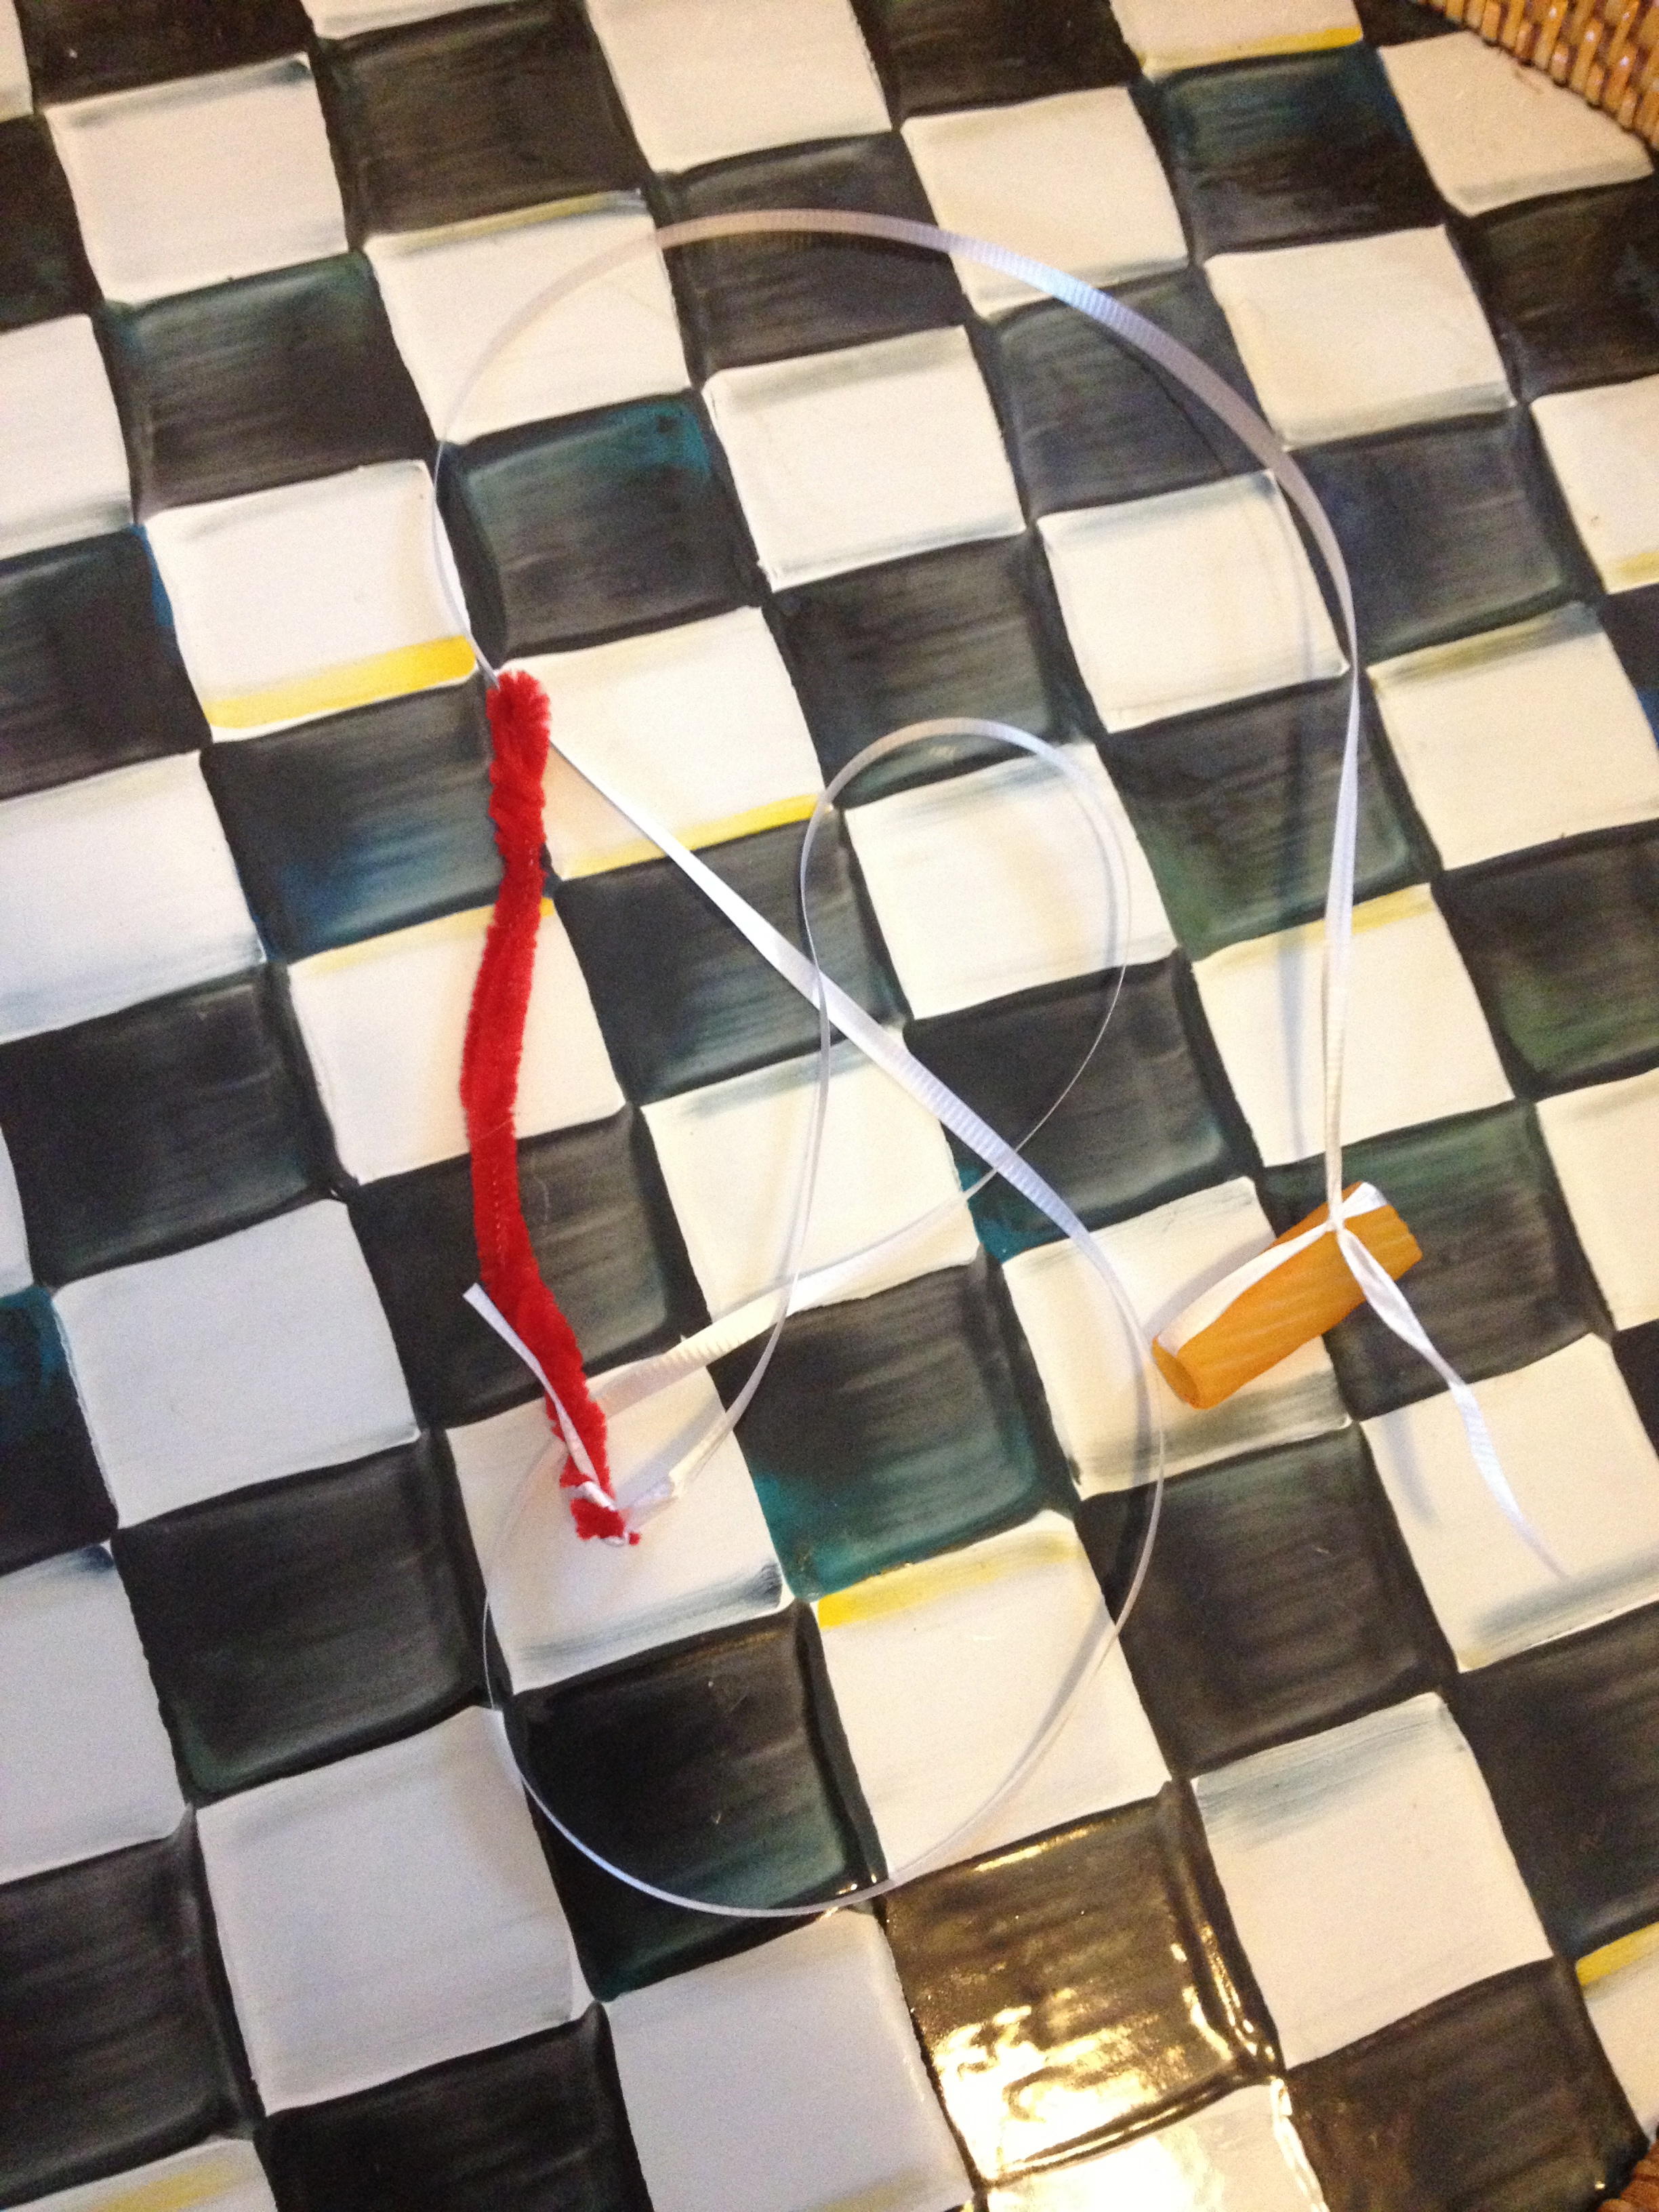
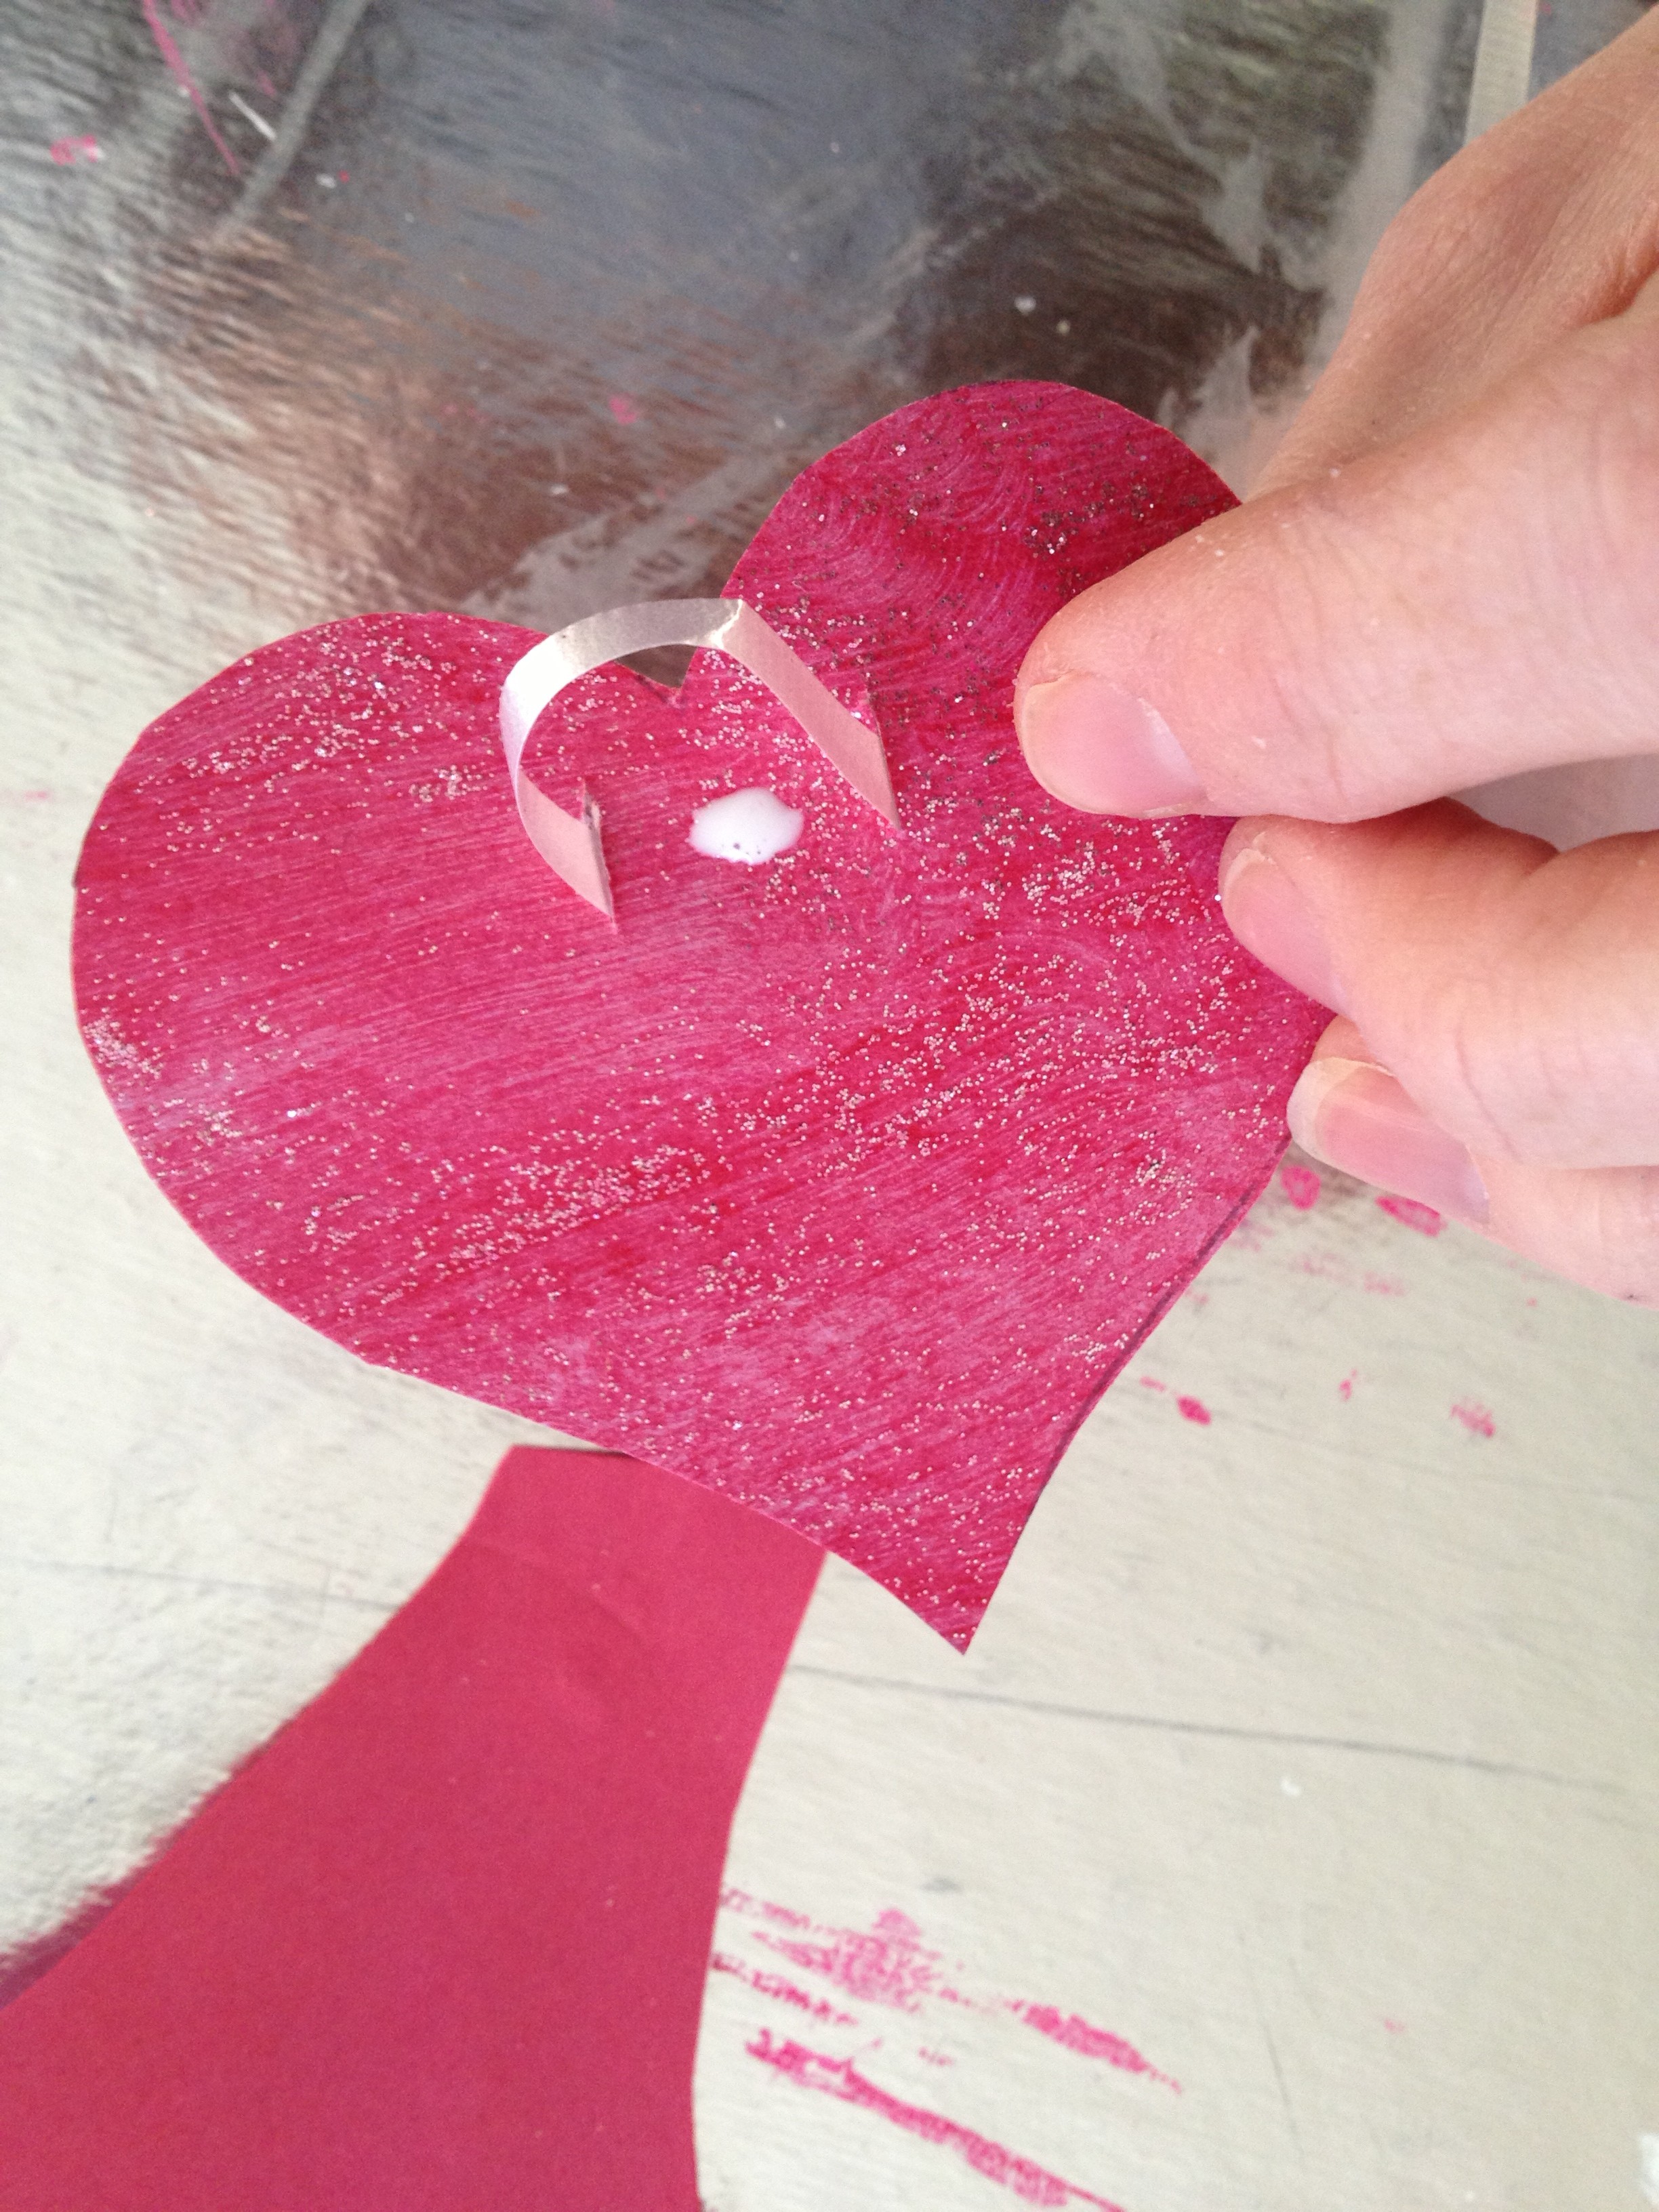
Using a sharp knife, cut two small slits (as wide as your ribbon) at the top of your heart.


Step 9:
Thread your ribbon through your slits and place a small dab of mod podge behind the ribbon to secure. Repeat this adding however many hearts that you want to add. We only ended up using four hearts for Reagan’s Valentine, her arm span is super short. I utilized the free printable (http://thepartyevent.wordpress.com/2012/02/05/valentines-crafts-for-kids-a-long-distance-hug-a-beautiful-present-for-someone-special-diy/), printed it on card stock, cut it into an oval and attached it to the string in the same fashion as I did with the hearts.


Step 10:
Take two cut out red hands and mod podge one side. Place the other end of the arm span measured ribbon onto the mod podge and then the other hand on top (You are sandwiching the string in between the two hand cut-outs). Press down firmly. I would recommend putting something heavy, like a book, on top of your hands until they dry. Repeat this step three times.
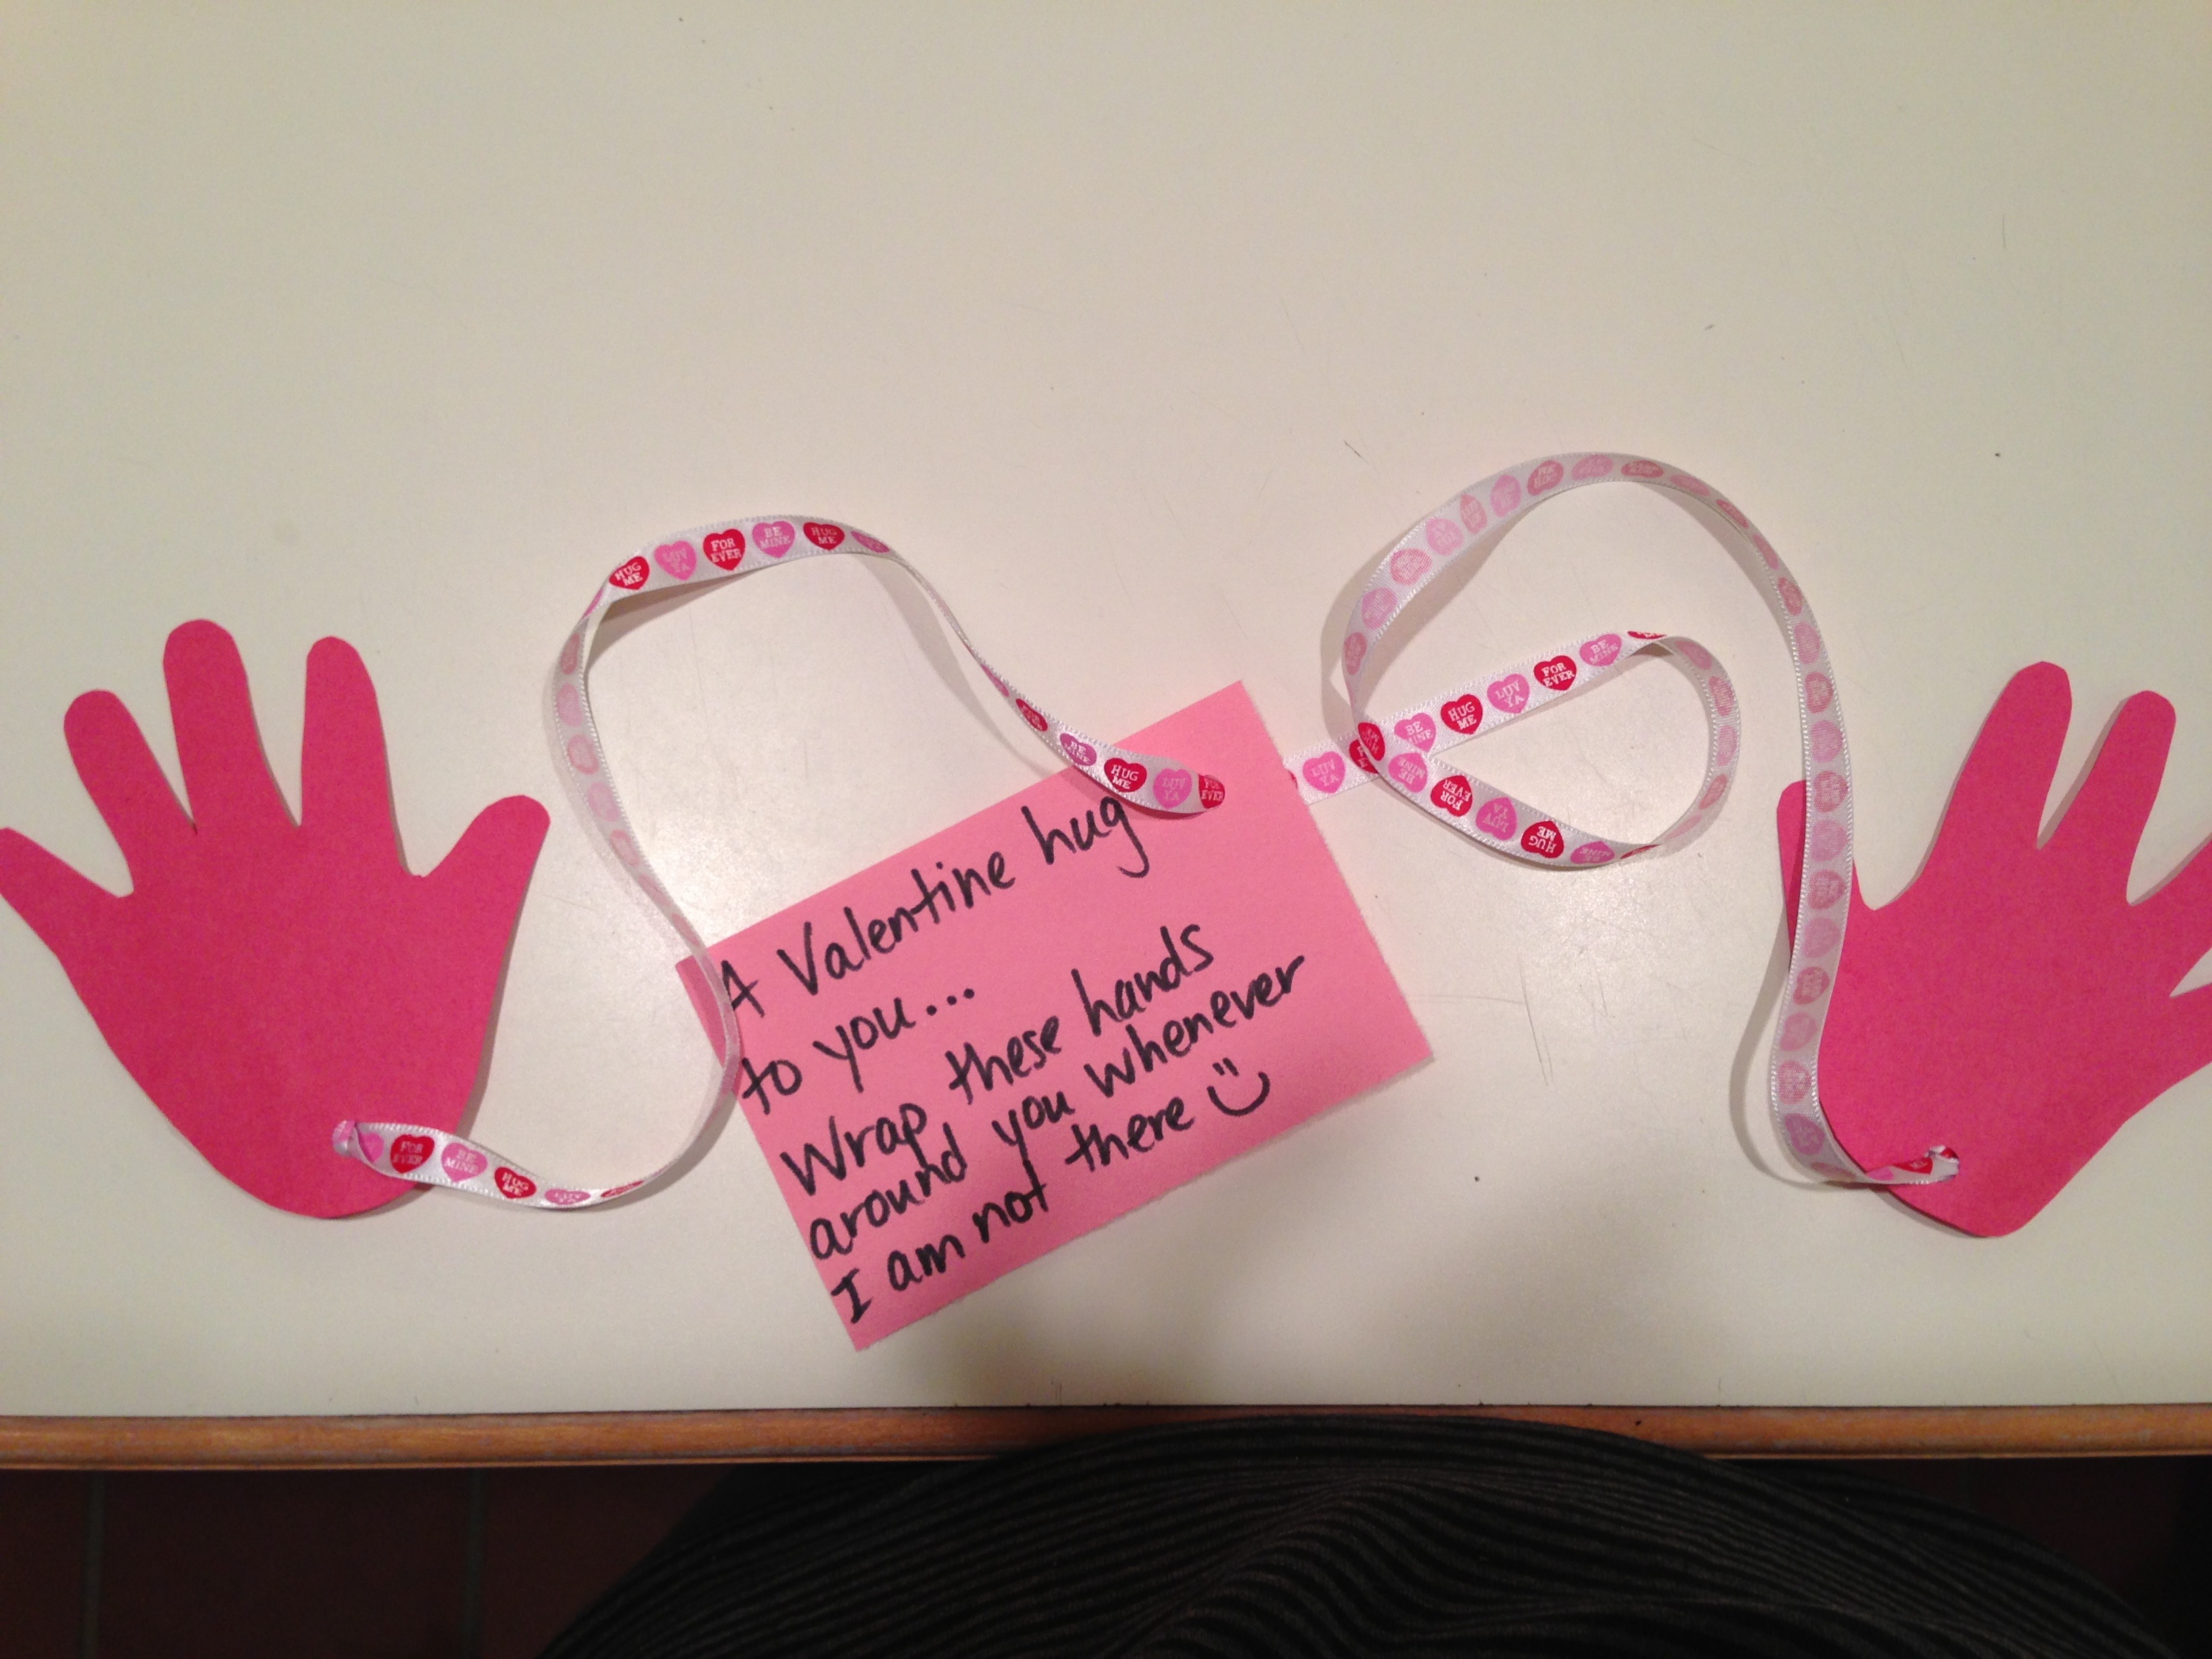
Reagan’s finished HUG
Erin and I did our own version of the same Valentine’s HUG and they both turned out fabulously! This just goes to show that you can take someone else’s adorable project and make it your own!
This isn’t just a HUG for a Valentine, it’s a precious gift that can be sent at anytime of the year!