Lash “Extender”

photo(5)

I’m not a big makeup girl, never have been.  Some days I look in the mirror and think that I probably should be, but I just really can’t be bothered.  I would rather spend that extra ten or twenty minutes doing…just about anything else!  Especially now that I’m a stay at home mom and know that my two little boys aren’t hard to impress and the hubs prefers a natural face too.  I hop out of the shower and slather on some moisturizer and I’m ready to go.  Well, that’s not exactly true.  I do have a bit of an addiction to…my mascara.  Without it I literally feel naked.  It amazes me what a difference it makes since I wasn’t graced with naturally long and full lashes.  Why does it seem like only boys get those?!?  Unfortunately, I’ve tried all the drugstore brands and they just don’t do the trick…figures.  Stubborn lashes.  And dragging a two year old and two month old to the mall isn’t at the top of my list of favorite things to do.  When my mascara starts to dry out I know that there is still a good amount in that little tube and it almost brings a tear to my eye to have to throw it away…almost.  So when I found this little trick floating around Pinterest (of course) I knew I had to give it a try!

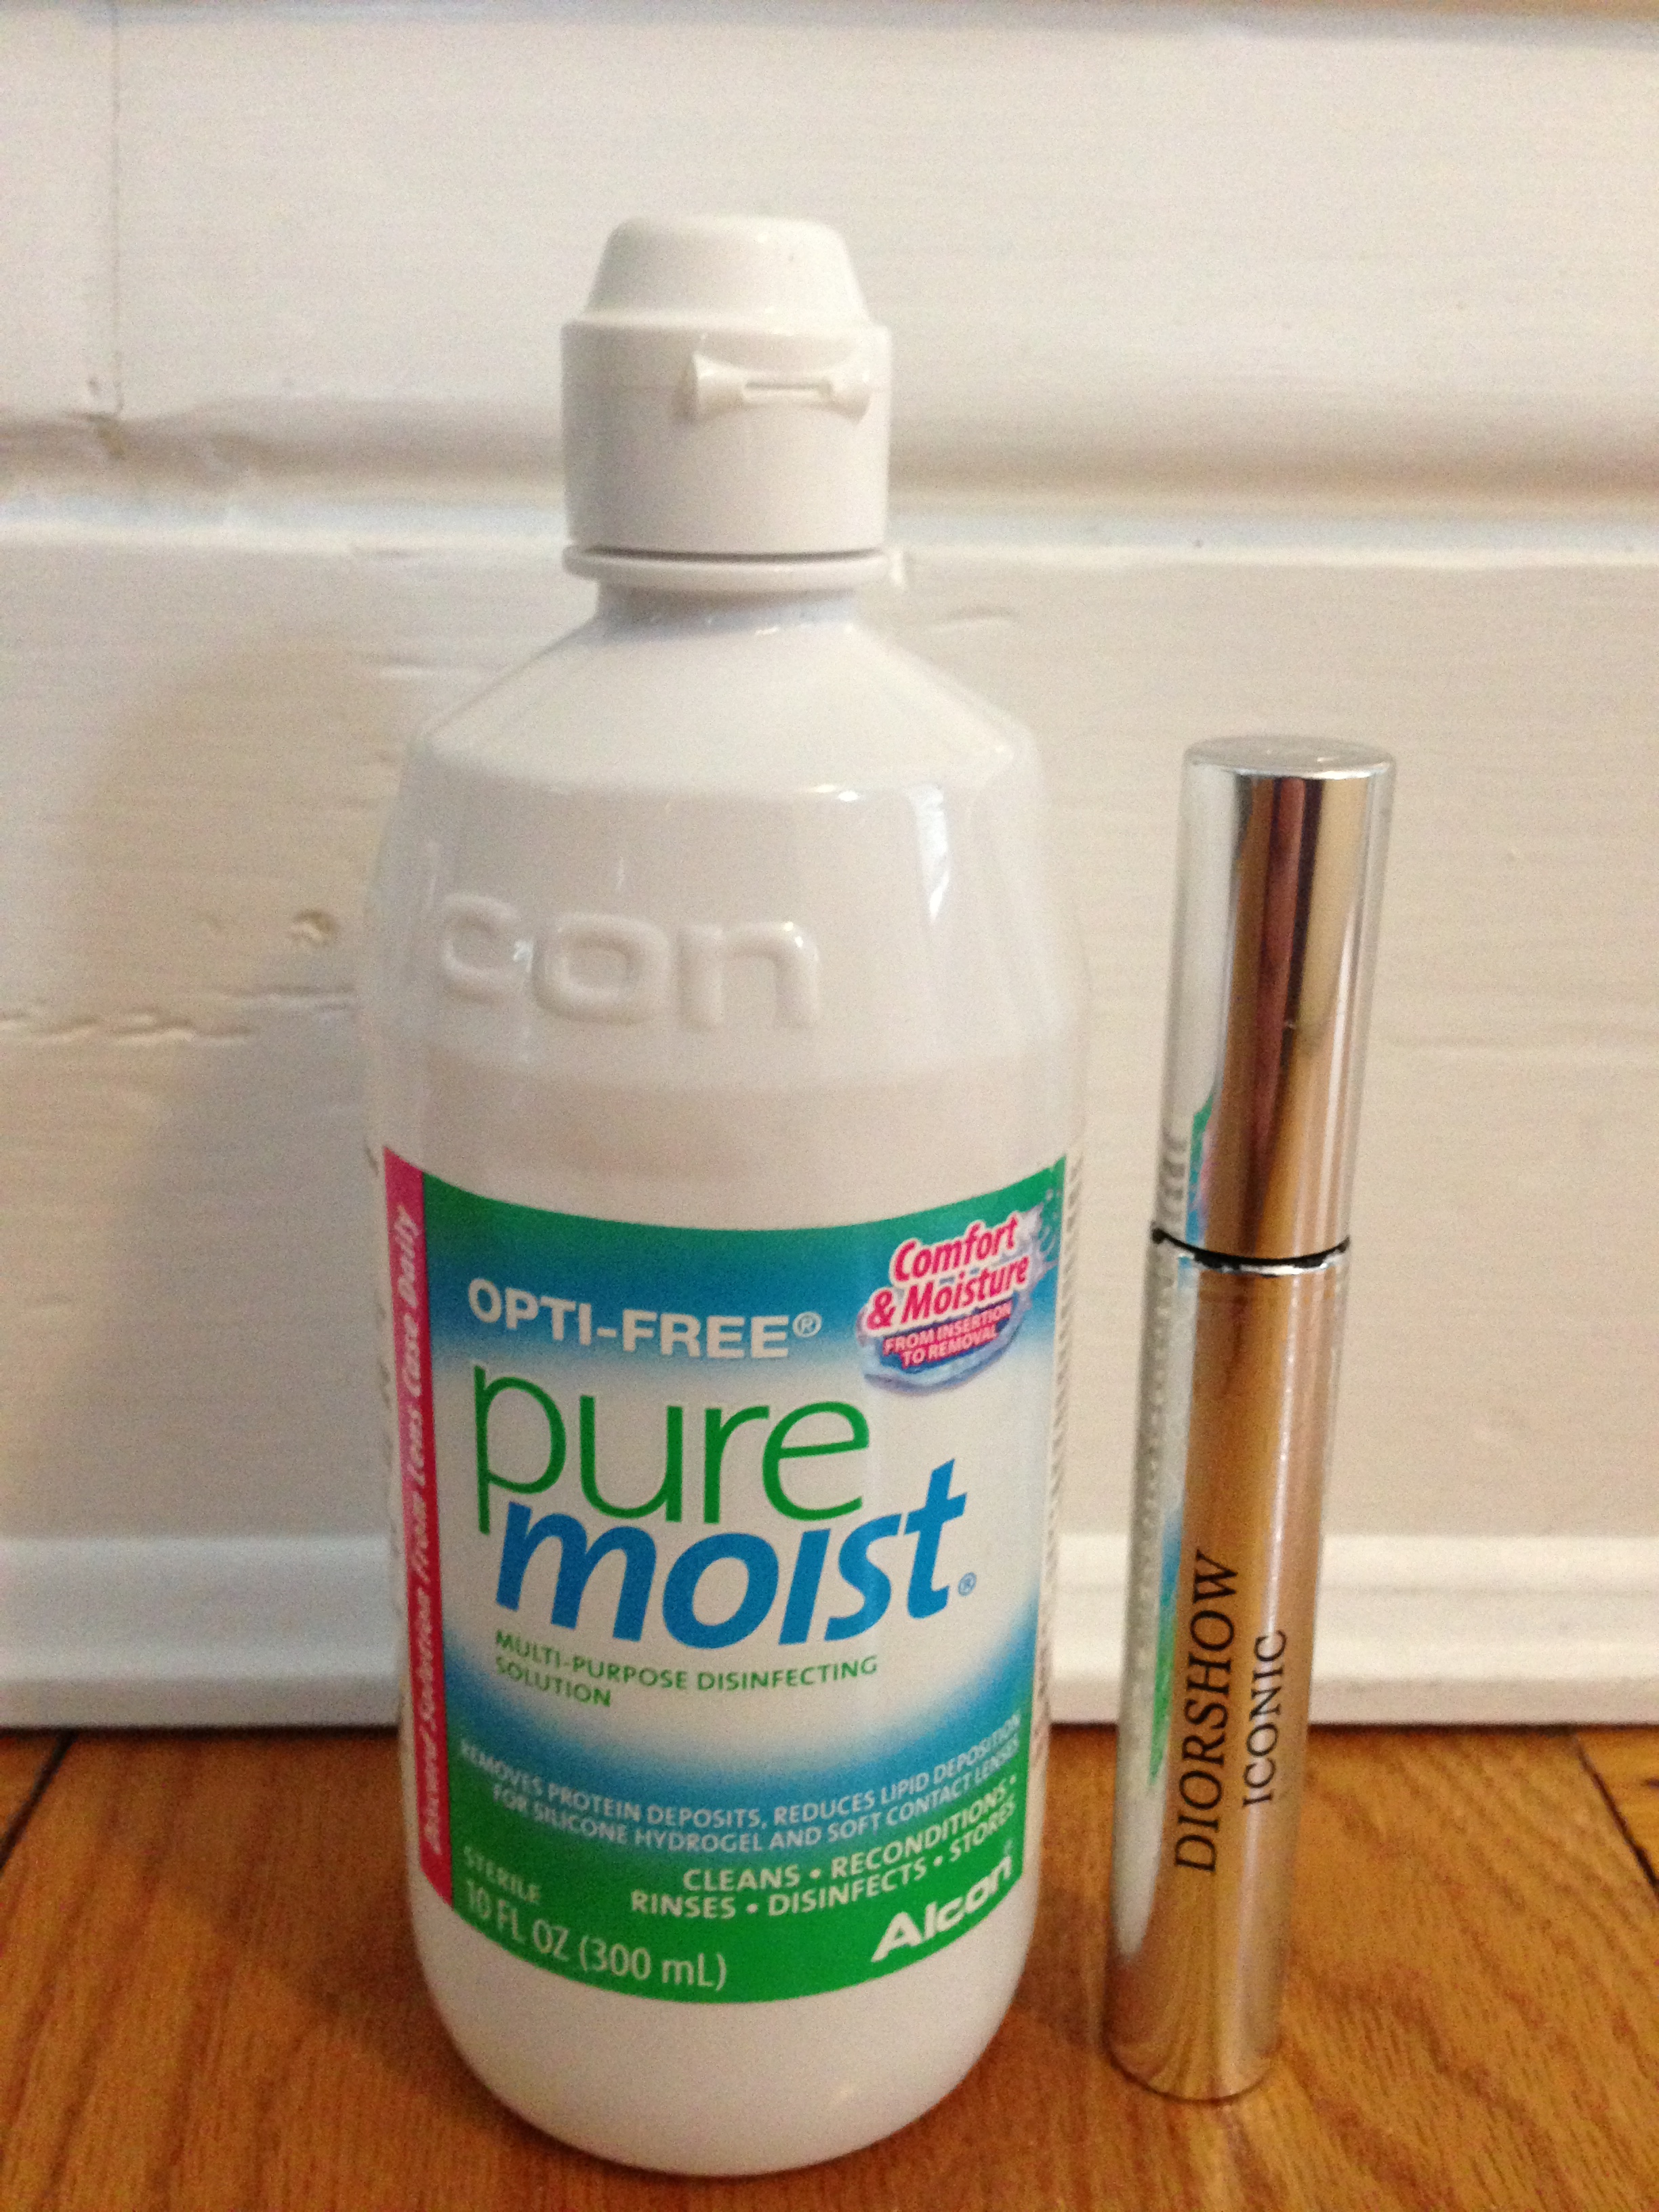
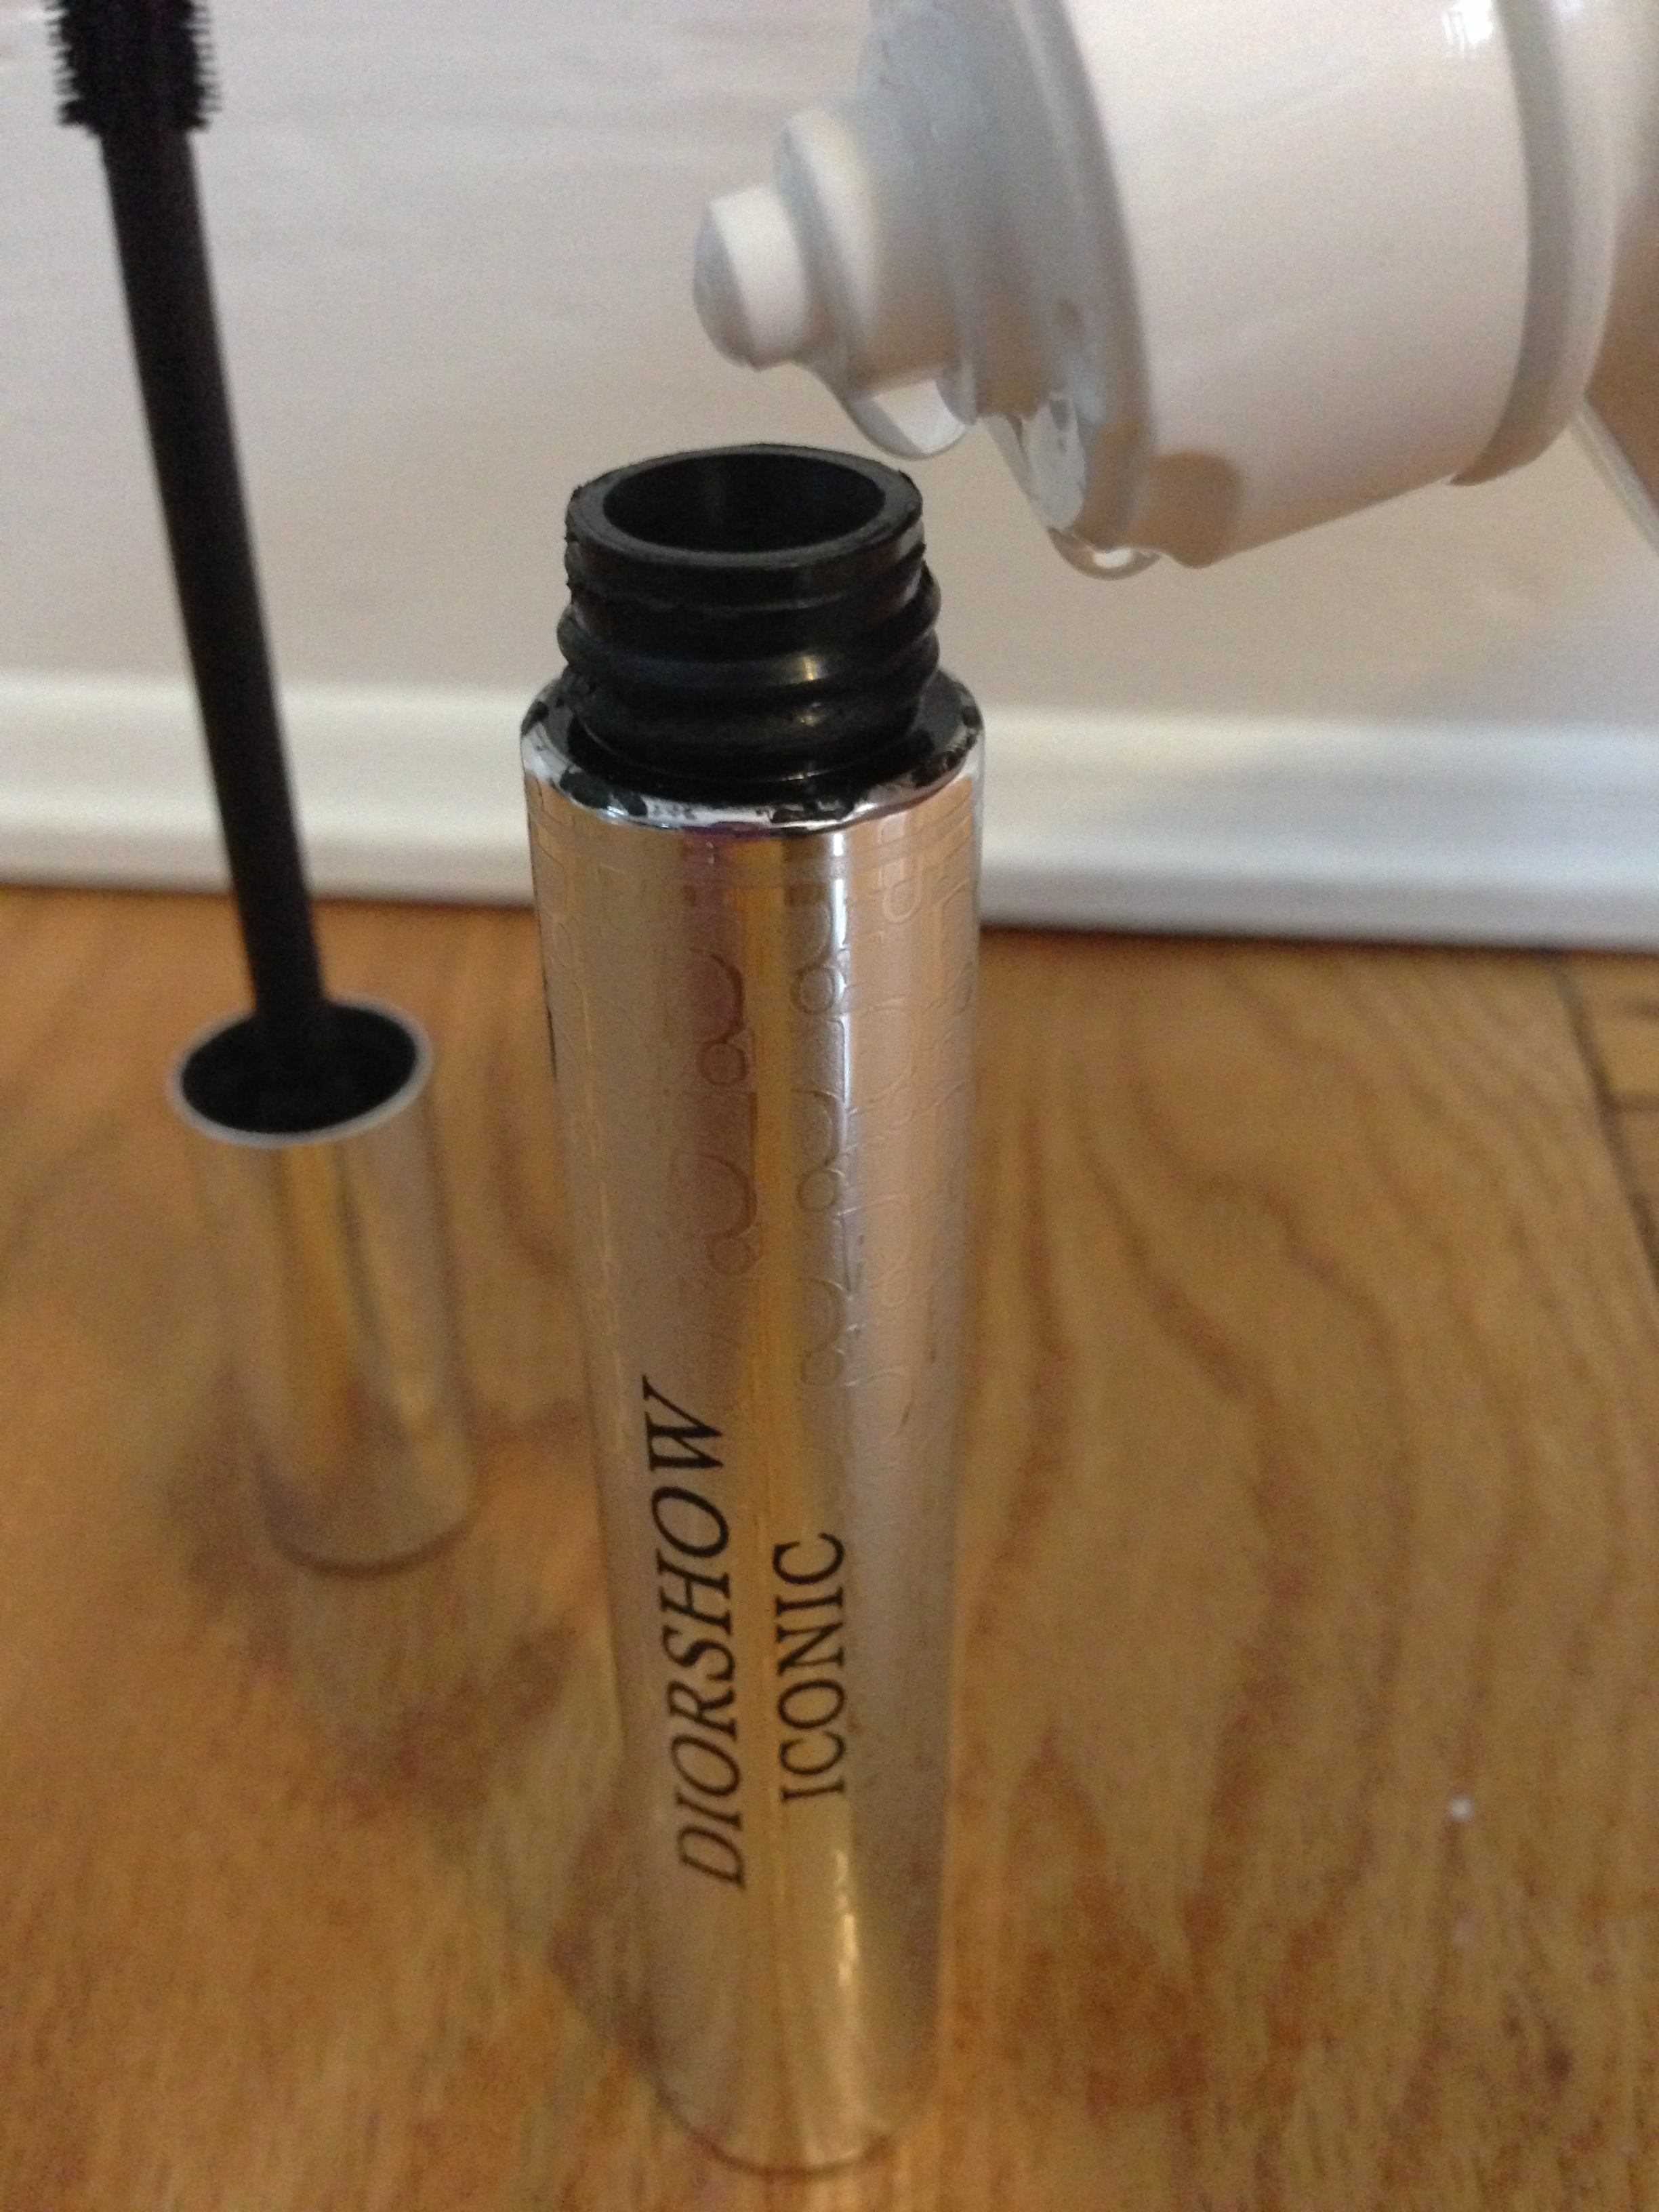
It’s a very simple and quick process.  All you need is some saline solution.  I used some contact lens solution because that is what I had lying around and it worked just as well.  Just add 3-4 drops to your mascara tube and stir.  Good as new!

photo(4)

I’m not sure how much longer it will last but I’m honestly happy if it’s even just a few extra days.  Apparently the process can be repeated 2-3 times too!

It’s all about the party… on your arm!

20130310-093041.jpg

Stacking, stacks or arm party are all things I’m likely to be calling the collection of items that ends up on my wrist. What is much less likely is my wrist being empty or only occupied by solely a watch when I leave the house in the morning. An obsession with costume jewelry is a polite way to put it but hey, everyone has their vices so what if this may be mine (or is it just one of mine, who’s really counting?).

I always start with the watch, be it gold, silver, black or rose, and then choose the rest of the stack from there. It’s fun to mix it up, wear new arrangements and make it interesting. Even in a simple t-shirt and jeans, a decorated wrist can turn the whole outfit around. When wearing a crowded stack I try and stick to simple jewelry elsewhere with studs and a thin chained necklace.

I’ve been trained not to play favorites, especially while teaching, but my gold Michael Kors watch would win, hands down. It’s my go-to that has been around for 5 years and for me to even like something for that long is an achievement. When buying costume jewelry, I rarely spend over $10/$20 on an item, mainly because they are from Forever 21 or deeply discounted at J.Crew and also because I will probably be over it in a season or two. But even when I’m over it, I still have a problem letting go. It’ll probably live in the jewelry closet for a while and maybe when one day I’ll get inspired to add it back into a new stack. Purging is not my strong suit and I have way too many things in my closet I haven’t worn because maybe…sometime…in the future, I’ll be mad I got rid of that gray knee length cotton dress that hugged me too tightly or maybe it will be in the same spot until we move out of this apartment? Anyways, if it’s here, it has a place and it’s organized, until I finally let go. But in the end it’s all about the party…on your arm.

Michael Kors Gold Watch / J.Crew Classic Pave Link Bracelet

20130310-095157.jpg

Moon Sand


What a mess…but so much fun! I underestimated the power that flour has to get all over anything that is anywhere close to it. Reagan and I started this activity on a towel that I set down on top of the kitchen rug. Within minutes, I had to roll back the kitchen rug, because the flour was starting to get everywhere. We will definitely be doing this activity outside next time.

The amount of each ingredient depends on the amount of Moon Sand that you want to make. We used two cups of flour and just continued to add baby oil until we reached the consistency that we liked. Reagan used the measuring cup, measuring spoon, large spoon and spatula to stir the sand, scoop it from one container to the next, create sand mounds and so much more!

Materials
Flour
Baby oil
Bowl or Tupperware container
Measuring Cup
Measuring Spoon
Large Spoon
Spatula

Measure desired amount of flour into a bowl or plastic container that your child can manipulate easily. I used a glad plastic container that has side gripped handles that are thin enough for Reagan to hold onto and is large enough for her scoop in and out of, as well as to build in.

Add baby oil, stirring with a spoon or spatula and squeezing with your hands until desired consistency is reached. I wanted to be able to form balls with our sand, so I continued to add baby oil until we were able to do so. We probably added about 1/4 cup of baby oil- total guesstimate.

Reagan played for about 25 minutes with the Moon Sand and loved every minute of it! The baby oil made our hands super soft and left them smelling fabulous as well–thanks to the lavender-scented oil!

We threw away the Moon Sand, put the dishes in the dish washer and shook the towel outside before washing.

Burrito Obsessed


I find myself in a dinner jam more and more often. I don’t know what it is, but some days, I just can’t get my act together to get a nutritious and fulfilling meal on the table for my family. I vowed to make a list of freezer friendly foods that I could make, freeze and grab when I’m in a dinner funk.

My husband is burrito obsessed! So making some freezer friendly burritos helps me on my funk filled days and satisfies his burrito obsession.–So before I go any further…let me take back what I said above about ‘a nutritious and fulfilling meal’- fulfilling…yes- nutritious…not so much.

I added green peppers to some of the burritos, but neglected to add them to the ingredient picture.
I only added black beans to some of the burritos-I thought with both the refried beans and the black beans, it might have been bean overload!

Ingredients

1 lbs. fresh ground turkey
1 (16oz) can refired beens
1 (15.25oz) can of corn
1 (10oz) can enchilada sauce
1 (15.5oz) can black beans
1 green bell pepper
10 Large Burrito Tortilla Gordita Style Wraps
8 oz Shredded Cheddar
Plastic Wrap- I used Press and Seal
Wax Paper

Brown ground turkey in pan till no longer pink. Drain fat. Place in a bowl.

In a medium sized bowl- mix together the refried beans, enchilada sauce, cheese and corn.

If using green peppers dice and sauté in a tiny amount of butter in the same pan that the turkey was cooked in.

Remove tortilla wraps from package, place on microwave safe plate, cover with a moist paper towel and heat in microwave for 30 seconds. Doing this allows for easier rolling and less breaking.

Place ingredients into center of wrap.

Fold in the sides of the wrap (they will overlap),take wrap side closest to you and pull over two sides that you just folded and overlapped, then begin to roll. Try your best to keep all loose edges tucked in. Place wraps on wax paper lined baking sheet.

Place wraps in freezer for one hour to flash freeze.

After the hour in the freezer, remove the wraps and tightly wrap in plastic wrap. Label a large plastic zip lock bag with the contents and the date that they were made. I neglected to take a photo of my burrito bag- I included a picture of the bag that I use for our breakfast burritos.

To heat burritos- Remove from plastic wrap, rinse quickly under a running tap- making sure to wet the entire burrito- place on microwave safe plate and heat for 3 minutes. Every microwave is different, you are aiming to heat the burrito all the way through. My husband and I LOVE these burritos- He eats them plain, I prefer mine with a large dollop of sour cream! Yummy!

Spaghetti Spaceship


Another fantastic fine motor activity! Henry and Reagan enjoyed this activity and spent about twenty minutes breaking their pasta noodles, sticking them into the play dough and then placing the Cheerios onto the noodles. Henry’s verbal skills are much more advanced than Reagan’s and his imagination is fantastic!. He talked about how the play dough was a spaceship, the noodles were seats and the Cheerios were the space men.

Materials for Two:
Spaghetti Noodles- We used 5 noodles
Play Dough- Enough to make two balls
Cheerios- A small bowl for each child

Form play dough into a ball and then flatten on the bottom.

Break noodles in half or whatever size you want.

Insert noodles into play dough.

Place Cheerios onto noodles.